Let it snow, snowflake craft
Let it snowflake
Let it snowflake — as in let’s make a snowflake! There are so many different ways to bring the white stuff inside without messing the house up with melty snow and wet carpet. There are simpler ways to create them — at least one idea will come later. This snowflake isn’t difficult at all. Once you’ve made one my guess is that you’ll make more (in a lot of different sizes).
November
Nooo–veeeeemmmm–brrrrr.
It’s a month of “official” thanks and giving. It’s also a month of more questions such as, how much longer will we be teaching at home? Will the schools that are open stay open? Do you think anyone will be wearing a mask at the Thanksgiving party? Are we going to have a Thanksgiving party? Will there be more than five people there?
Most importantly, do you like pumpkin pie?
That would be a no from me
Unless you have a recipe that needs to be tried because I’m all for that. Okay, I’m halfway for it.
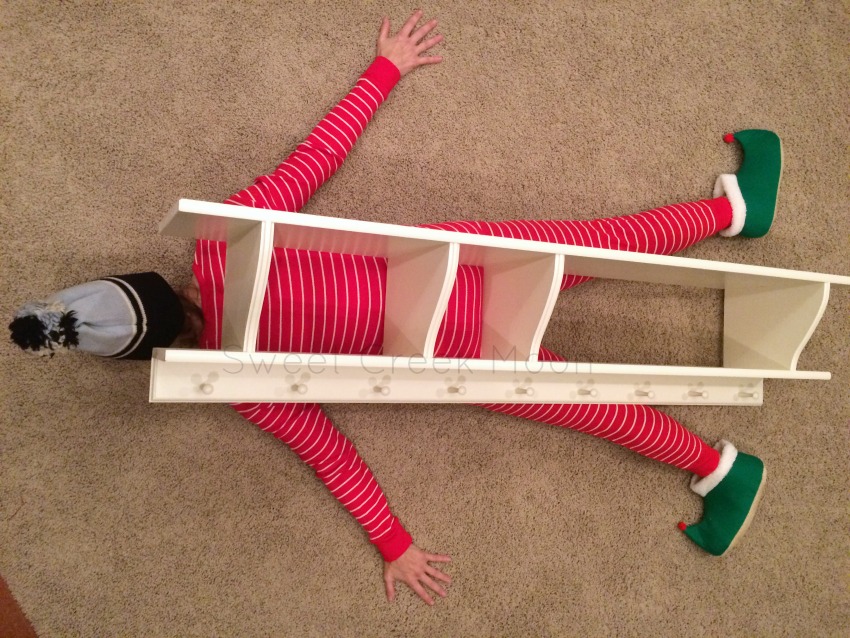
November also brings our local favorite back to the building: Agatha Clare-Elven Princess of Mischief and Ridiculousness. She’s a house elf that comes the Saturday after Thanksgiving and stays through December. May the force be with us.
She’s our Shelf on the Elf.
Squirrel.
Back to the ‘let it snowflake’ part of the show.
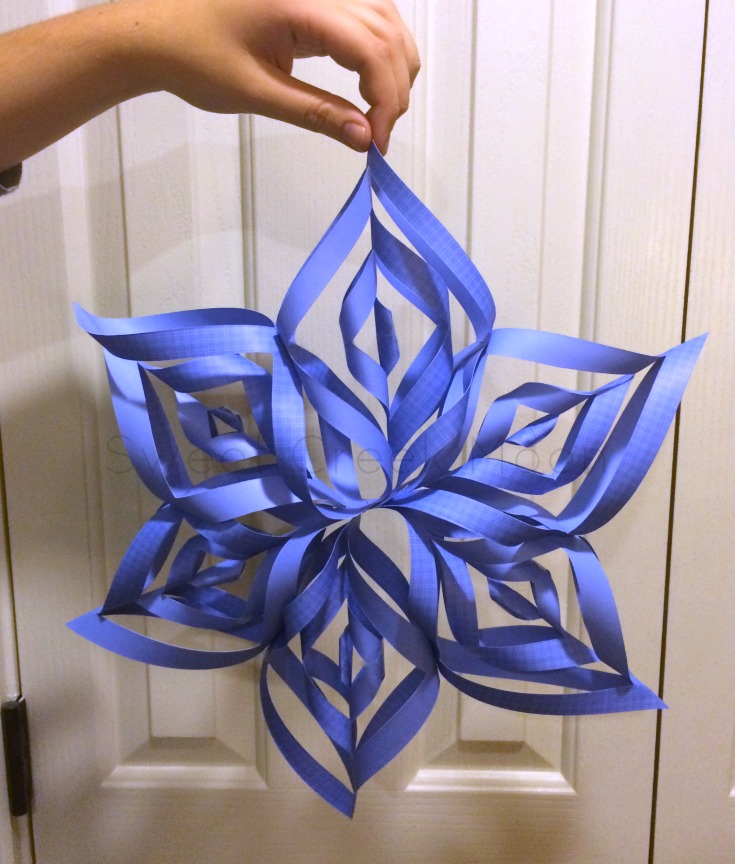
Let it snow snowflake craft
These are simple to create and the directions are all over the internet.
My uber creative niece (well, ONE of my uber creative nieces) helped me put together a masterpiece of a tutorial video. ~grin.grin.grinnity.grin~
Here’s what you’ll need
(before you press “play”)
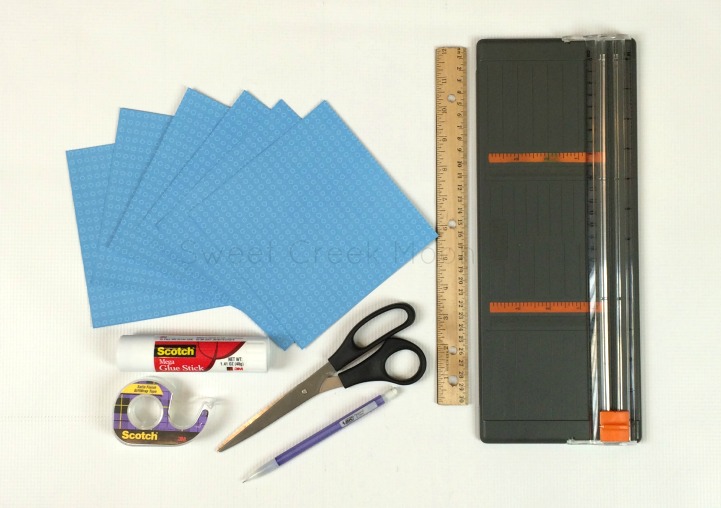
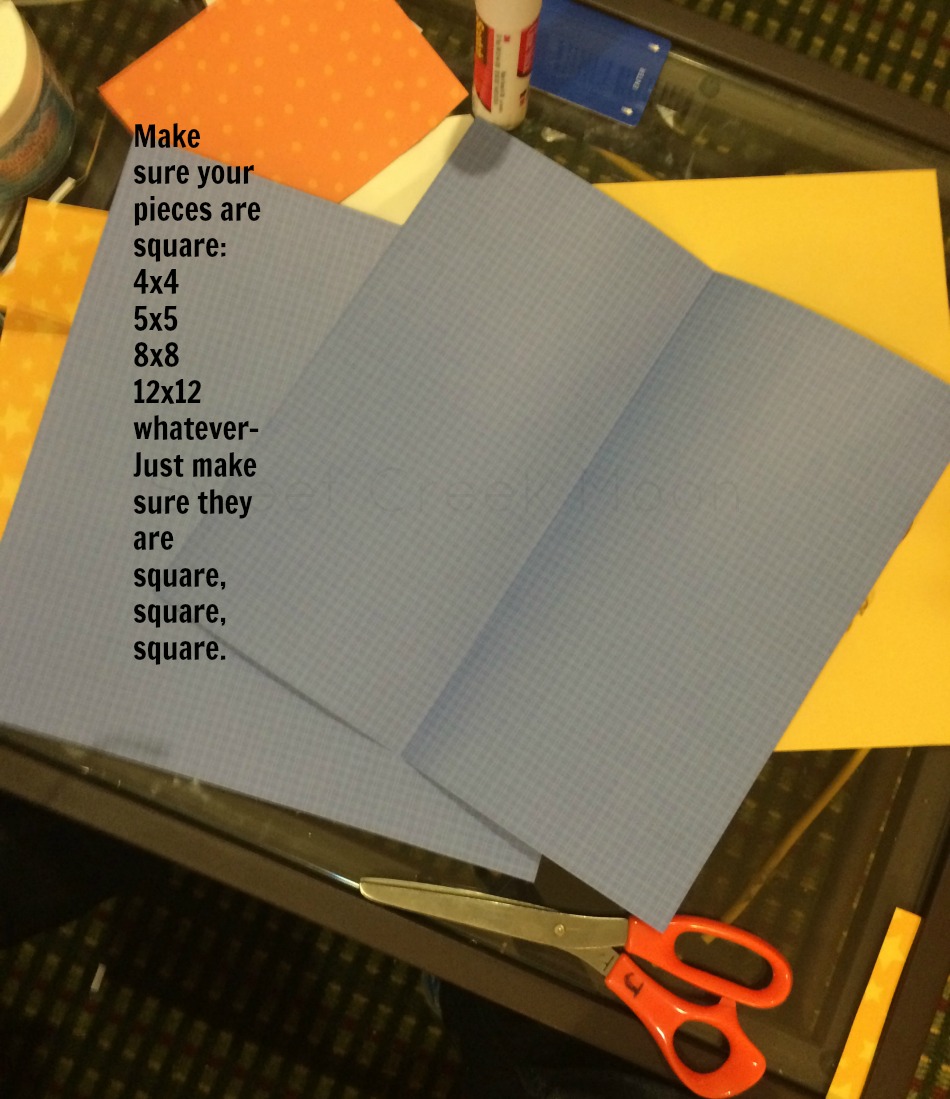
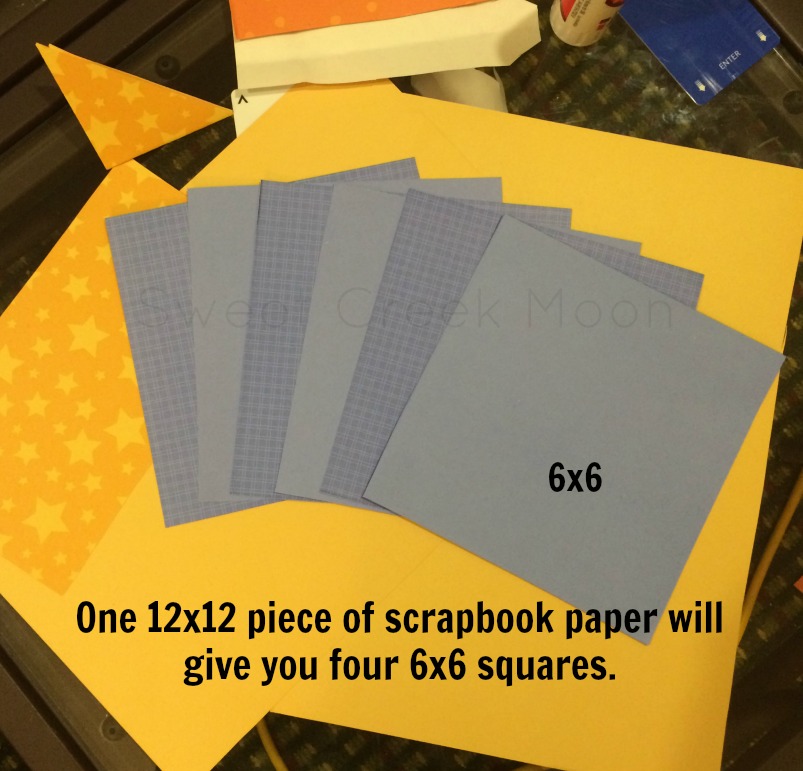
–6 squares [mine happen to be 6×6 but I’ve used 12×12 and 3×3 sizes–just be sure they are square–rectangles definitely won’t work–and circles–circles won’t work either]
–clear tape, 1/2″ thick works the best for me–just use what you have [except not duct tape–you will weep and wail, my friends]
— or glue/stapler if you’d prefer to glue/staple instead of tape—or do a combination
–scissors
–a paper cutter, to cut the squares with OR use the scissors
–a ruler to measure the distance between the lines you’ll be cutting on the diagonal
[Unless you can eyeball the distance, which is what I did in the tutorial, because I forgot NOT to eyeball it.]
–a pencil to mark the lines you’ll be cutting on the diagonal
[Unless you are giving the whole eyeball thing a go.]
Consider skimming through the photos before actually trying to make a snowflake.
[A link to the video tutorial is at the end of the post.]
Here’s what you do
It would be worth it to practice on a plain piece of paper.
[Heed my warning, fair readers.]
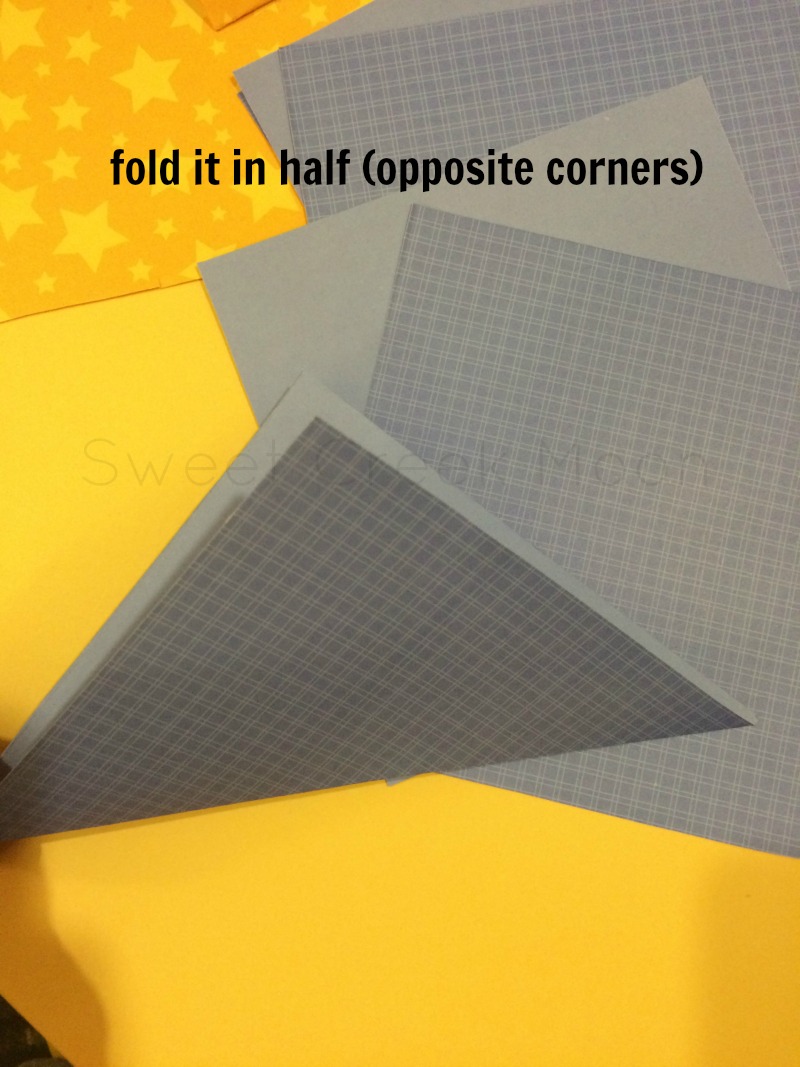
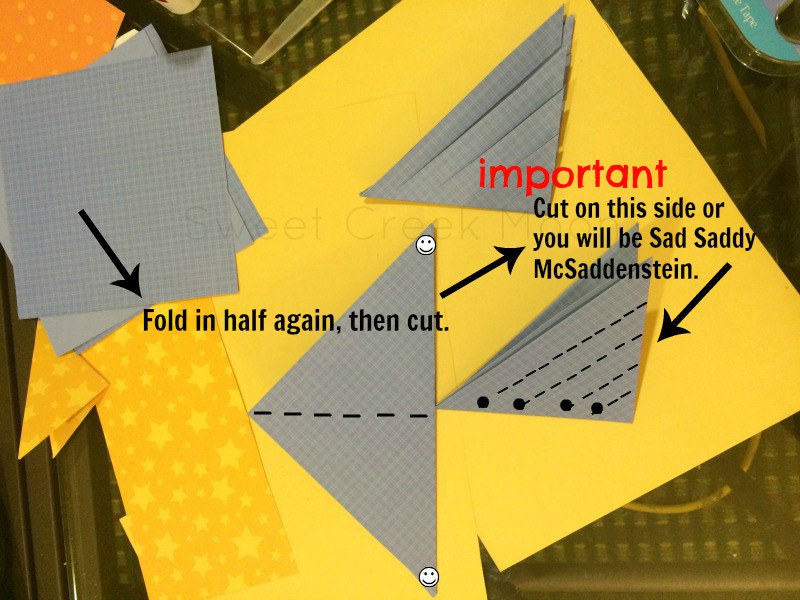
–fold in half again
–mark the lines you want to cut OR be crazy wild and eyeball it
–DO NOT CUT ON THE FOLD — if the folded paper was a bird, you would be cutting the wing part
–N O T I C E the red word spelled i-m-p-o-r-t-a-n-t in the photo
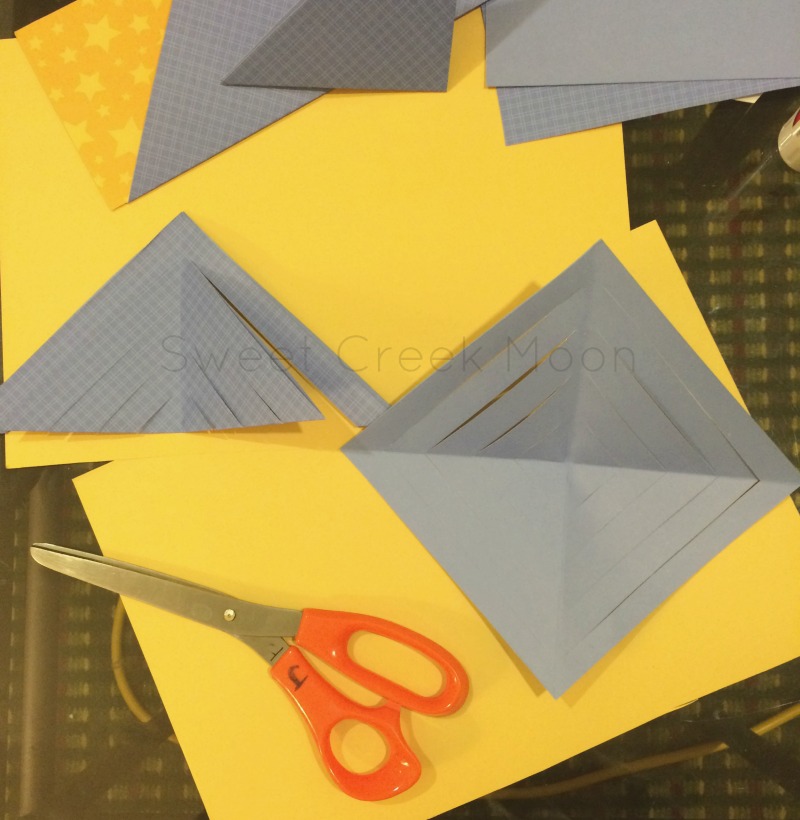
I just fold it like a book and hold ‘the spine’ of the book in my left hand while I cut with my right.
[There is a distinct possibility that that photo was less of an explanation than I intended.]
Ask questions, please.
~smile~
Okay.
Now all you need to do is watch the “Let it Snowflake” tutorial.
There’s a place in your house for a snowflake or two.
It’s the kind of decoration that doesn’t come down at the end of December. So—if you don’t have a moment to spare right this very moment–there’s still time.
Let it snow and while it’s snowing, craft away! Enjoy the snowflake craft.

what do you think?