Pampered pumpkins
I realized today (early this afternoon, specifically) that we don’t need a fancy-shee-shee-wah car that is apparently designed to “increase accident avoidance” — a car with a “smart sensor.”
Oh, no indeed.
I have a smart sensor in the car I currently drive.
It’s me.
~grin~
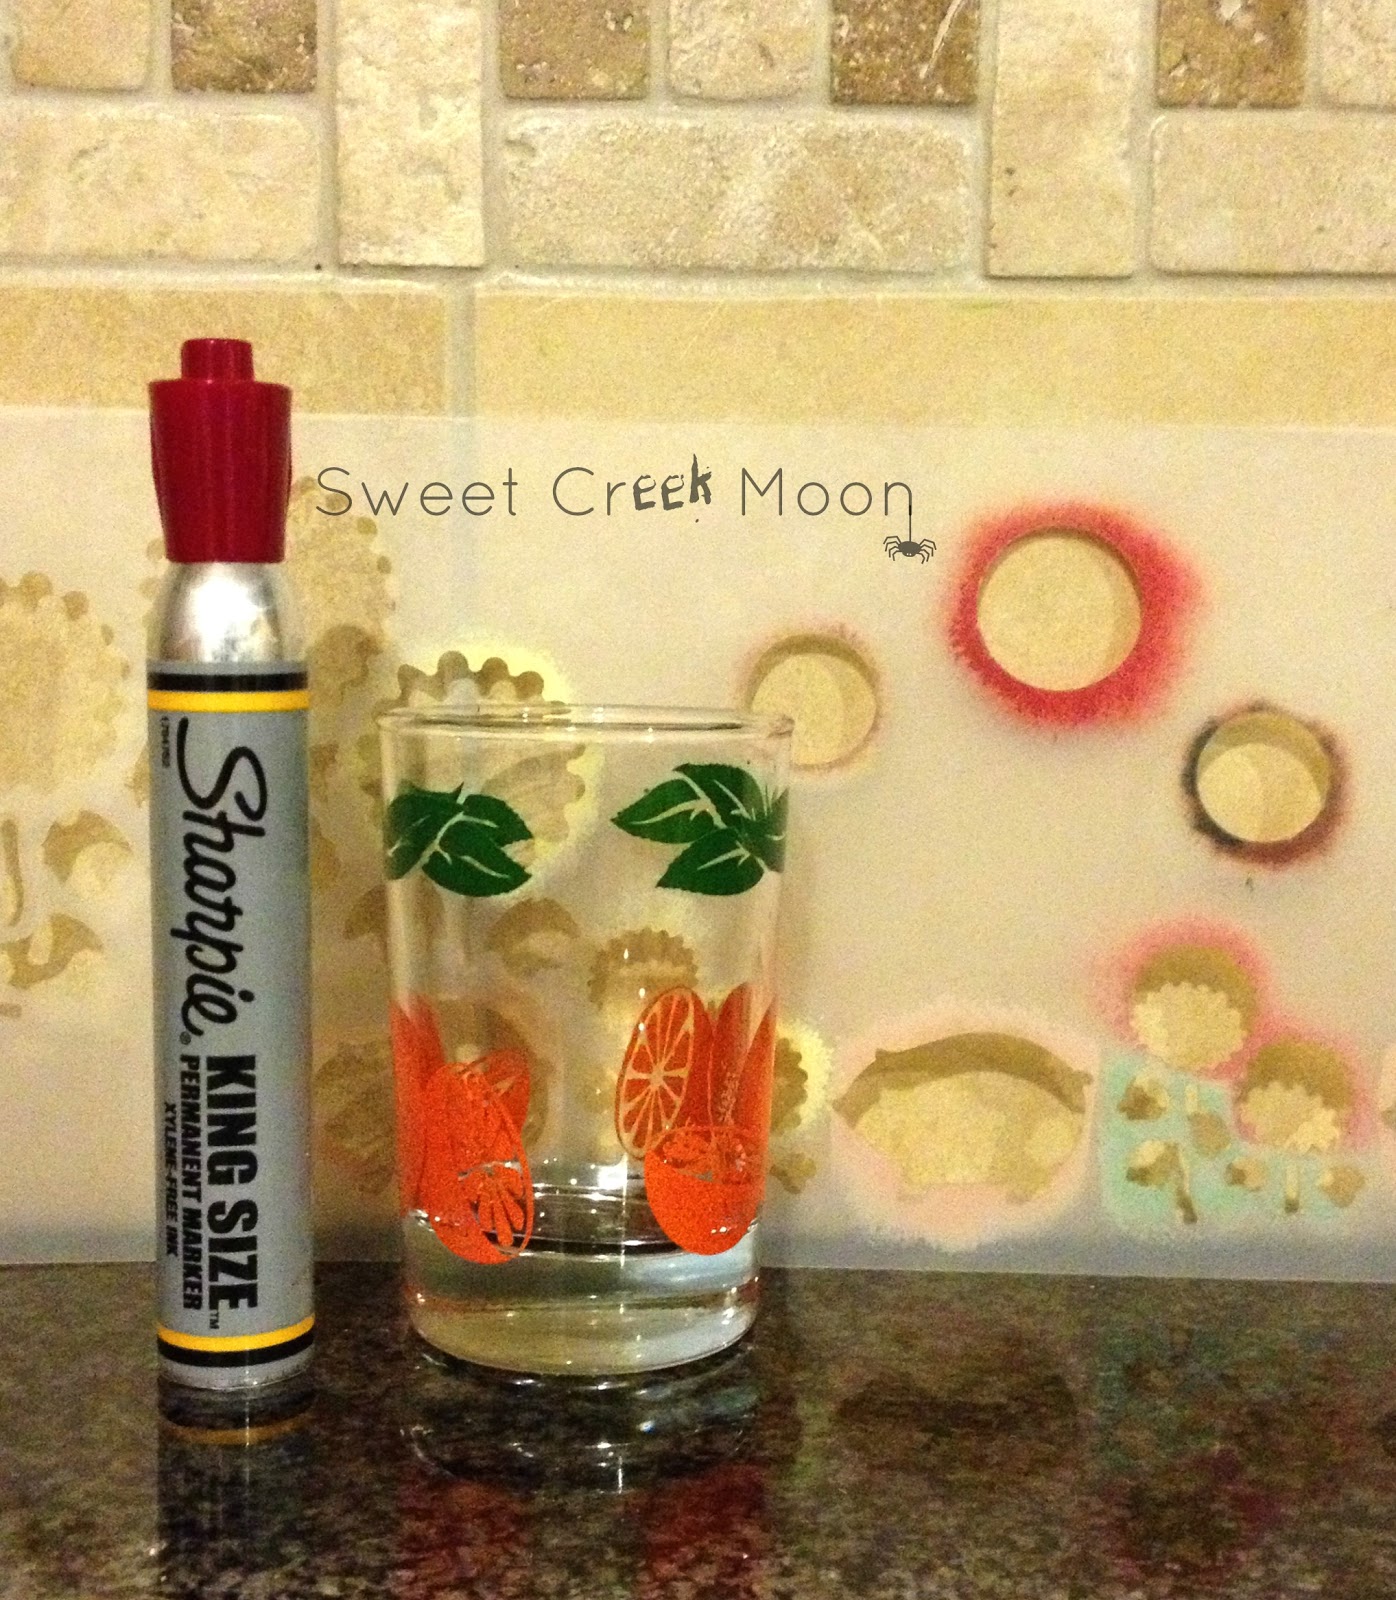
Remember these guys? I wondered if it would be possible to decorate a pumpkin and do it without consuming the entire day. Or even half of the day. Or even an hour. And without needing to purchase any new materials.
This little glass has been in the family for generations–it may have come over on a ship. A very long time ago.
No, it didn’t.
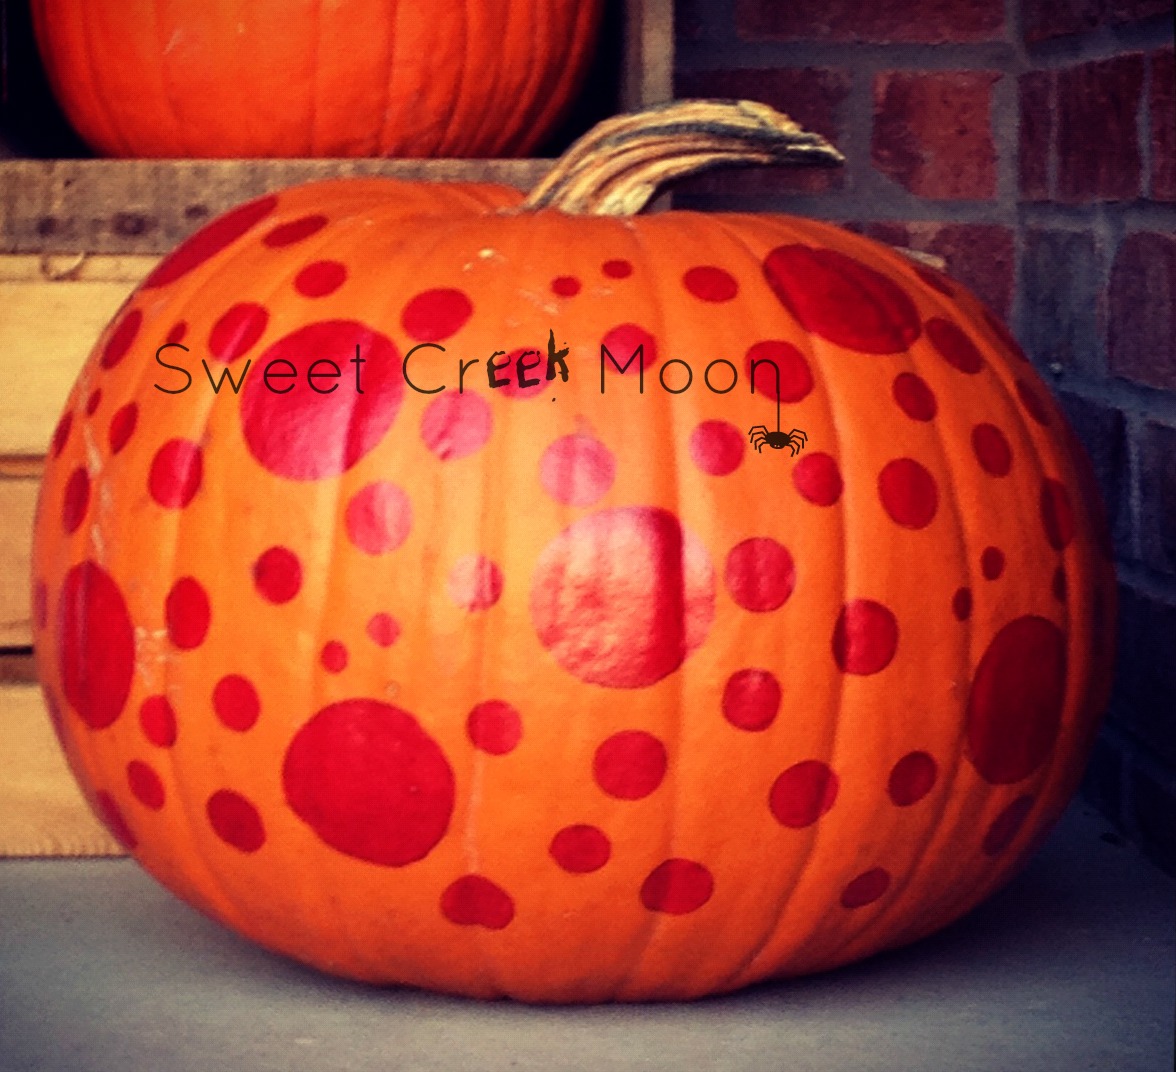
I used it to trace the largest polka dots. The well-used and equally antique stencil in the picture is what I used for the other polka dots.
Because I was being frugal with my time, I decided NOT to fill the entire pumpkin surface with dots. Which means the back of the pumpkin–the side no one will see–is sans dots.
I like it.
So I did.
Materials needed: whatever color of acrylic paints you have. (I used red, yellow, green and brown–because that’s what I had.)
I opted to paint a very simple flower.

–I used a little bowl in my cupboard to draw the center first–that’s how I knew what size to make the petals (which look white in the pic but they are yellow).
–Petals are next. Draw the petals on the pumpkin–and then paint them.
–Retrace the center of the flower using the bowl. Paint the center.
–While that takes a few minutes to dry, draw and then paint the leaves.
–Generously apply two coats of paint to all (leaves, petals, center) of it. (No pumpkin peeking through.)
–Use the handle of three different paint brushes to add the circles to the middle. (An unsharpened pencil/its eraser, the end of a pen, or a dowel would work.)
–Outline everything with a black Sharpie.
Ta-da!
[Just so you know–I wouldn’t outline the center dots with the Sharpie if I did this project again.]
Now some of you may know this intuitively–there is some ‘punch’ in decorating with odd numbers (1, 3, 5, 7). Certainly there is beauty in symmetry–but quite often when it comes to grouping things–odd numbers work well. This blog explains it clearly AND has some pics. (You’ll notice that some of the photos have examples of both grouping in odd numbers, and symmetry.)
Which will explain why I decided to pretty-up the third pumpkin.
This time I really wanted to see how quickly it could be done.
I came up with this:
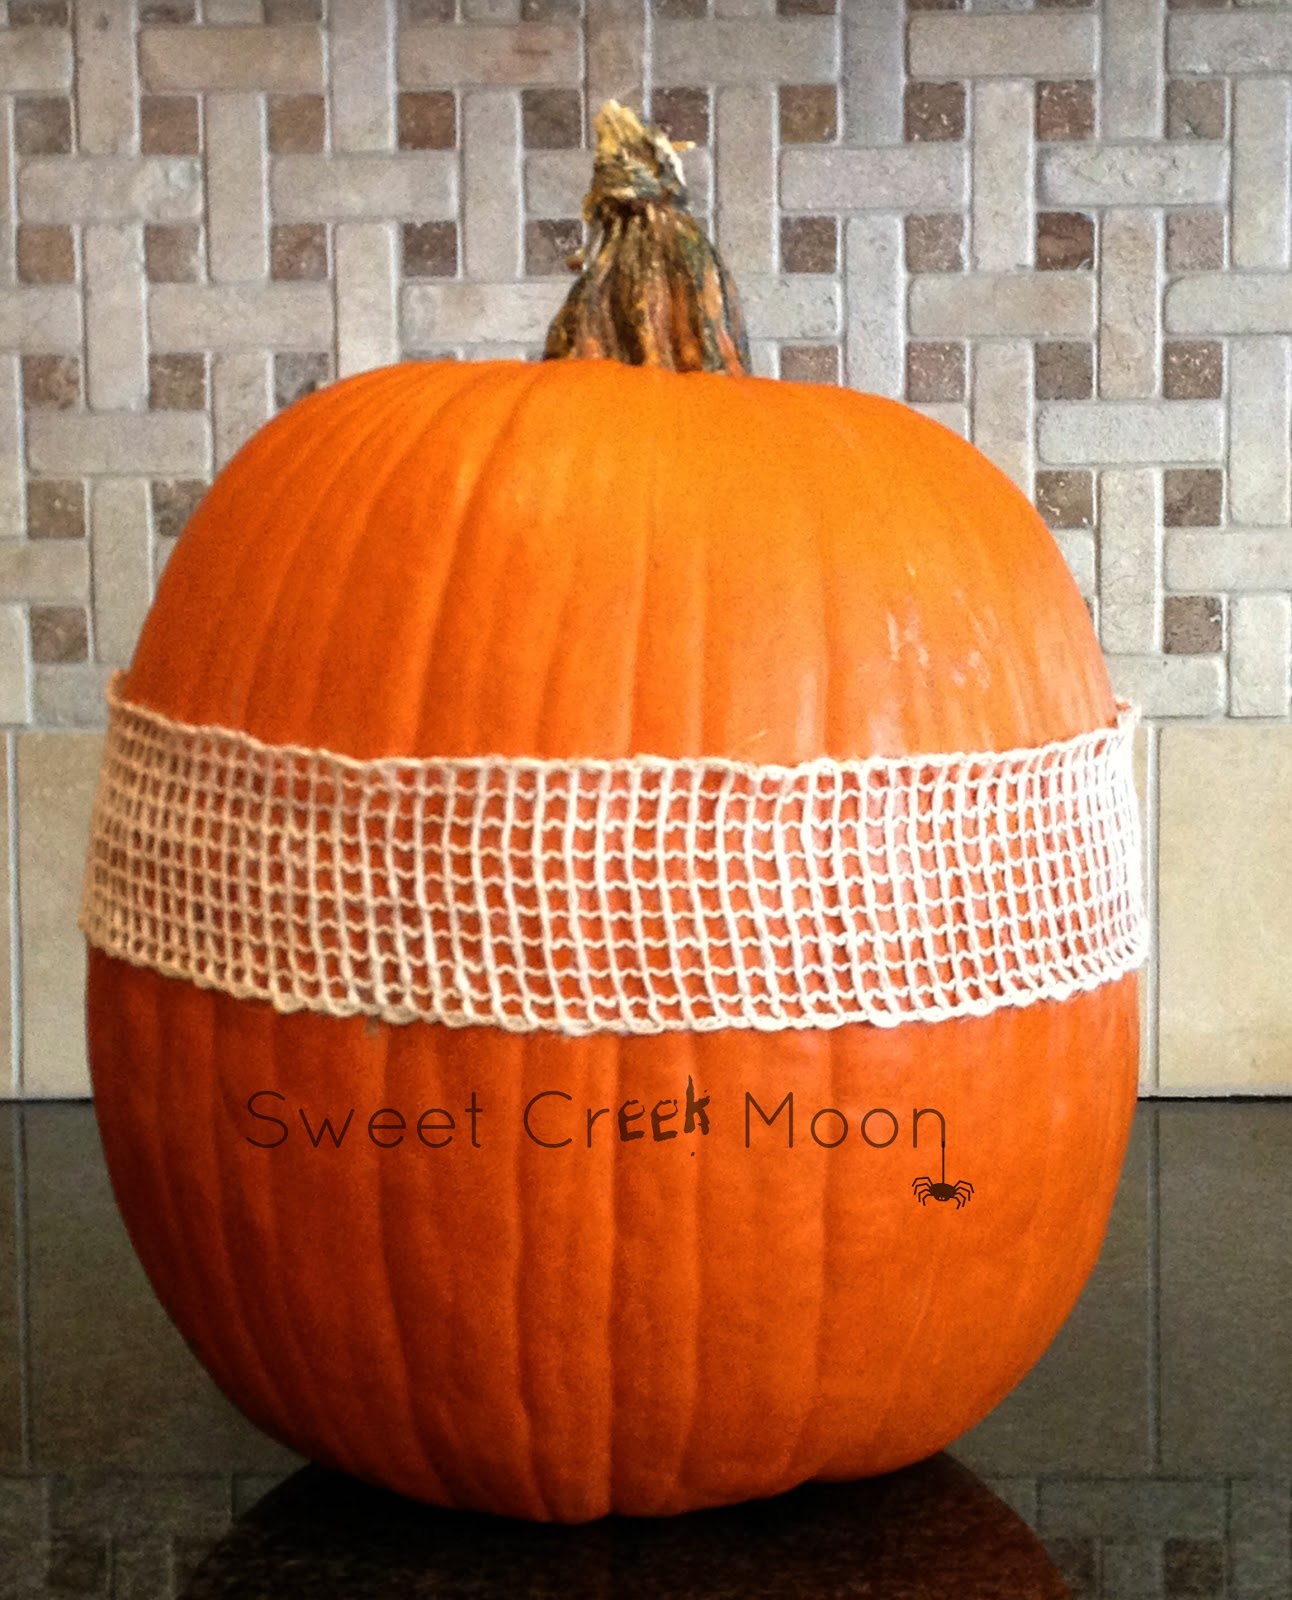
It’s a trim I purchased to decorate some kind of wreath with (another unfinished project). I would still like to use the trim on something else–so I didn’t cut it OR glue it.
I used pins to anchor it to the pumpkin–in the back–so it’s not visible.
[#gulp# You know what just occurred to me? Oh–if those dumb stinkin’ doe-doe head deer try to make a tasty treat out of these pumpkins they. are. in. big. trouble. #rawr#]
And I added a row of ric rac.

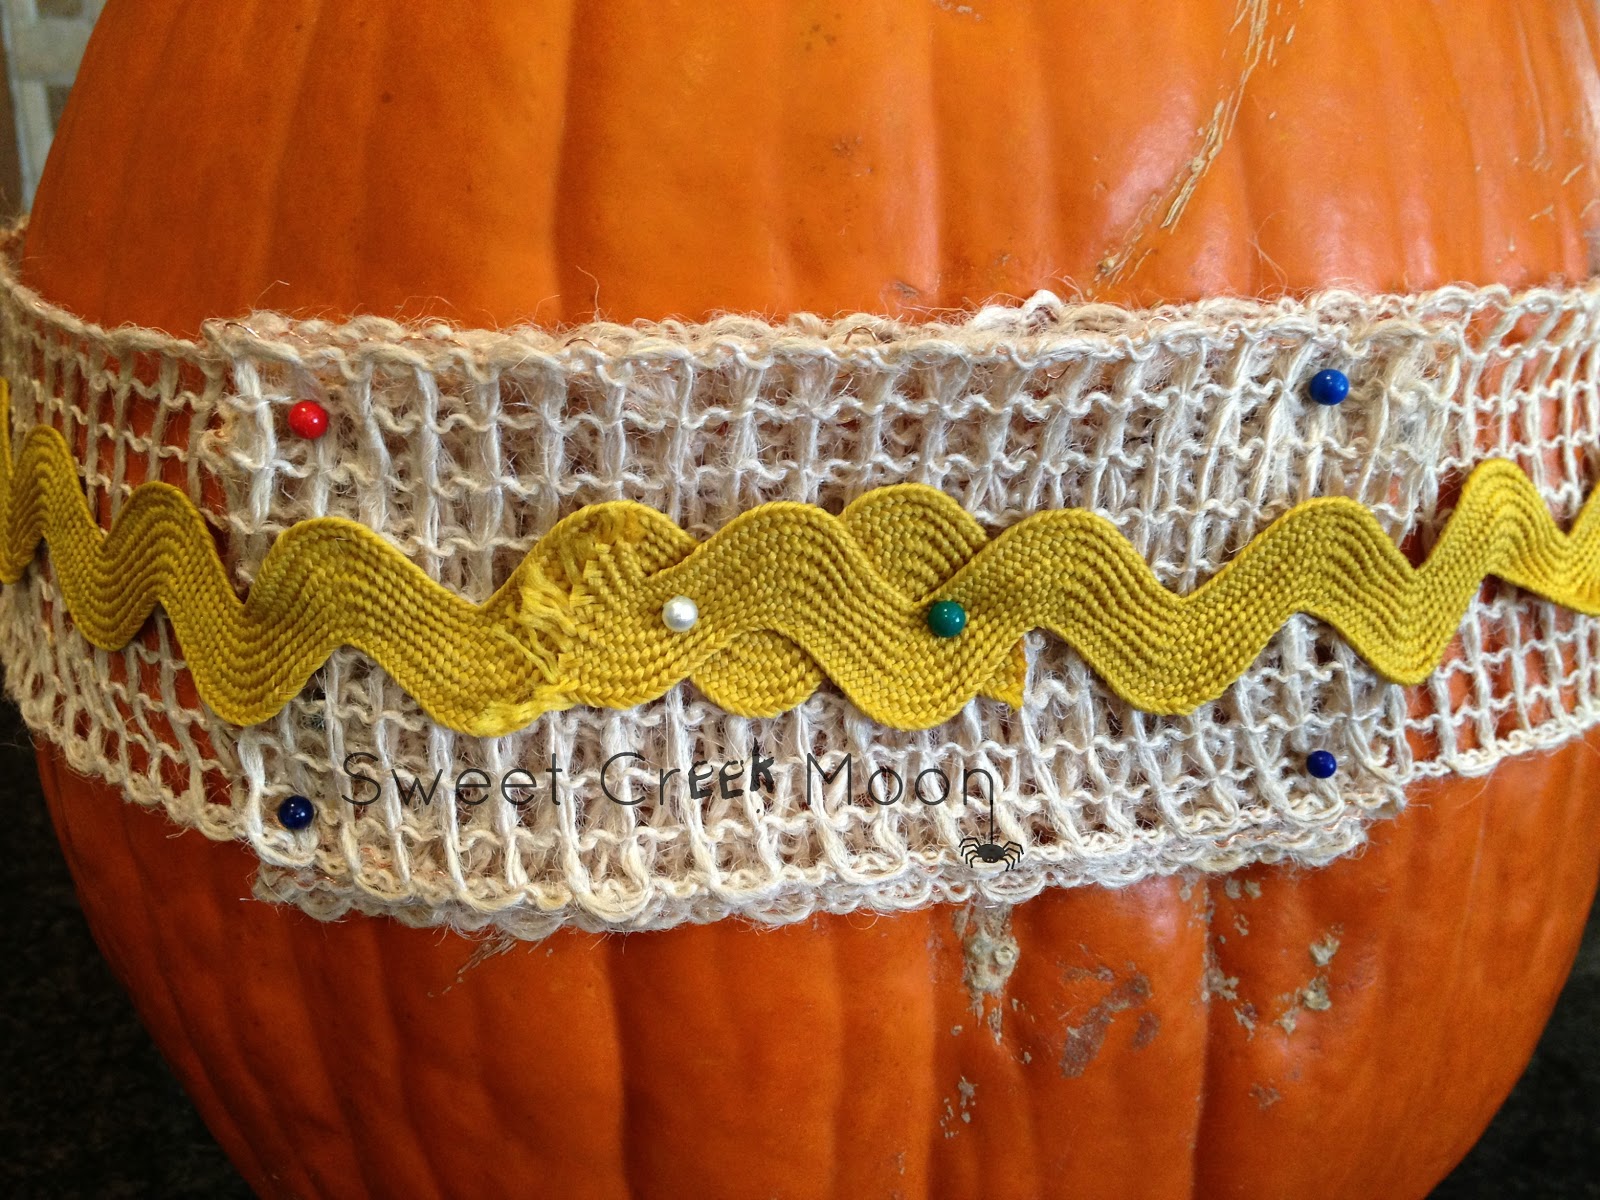
Pins, pins, pins. Which means I can use both trims again. Nnnice.
This pumpkin required 15 minutes to complete. That’s fabulous.
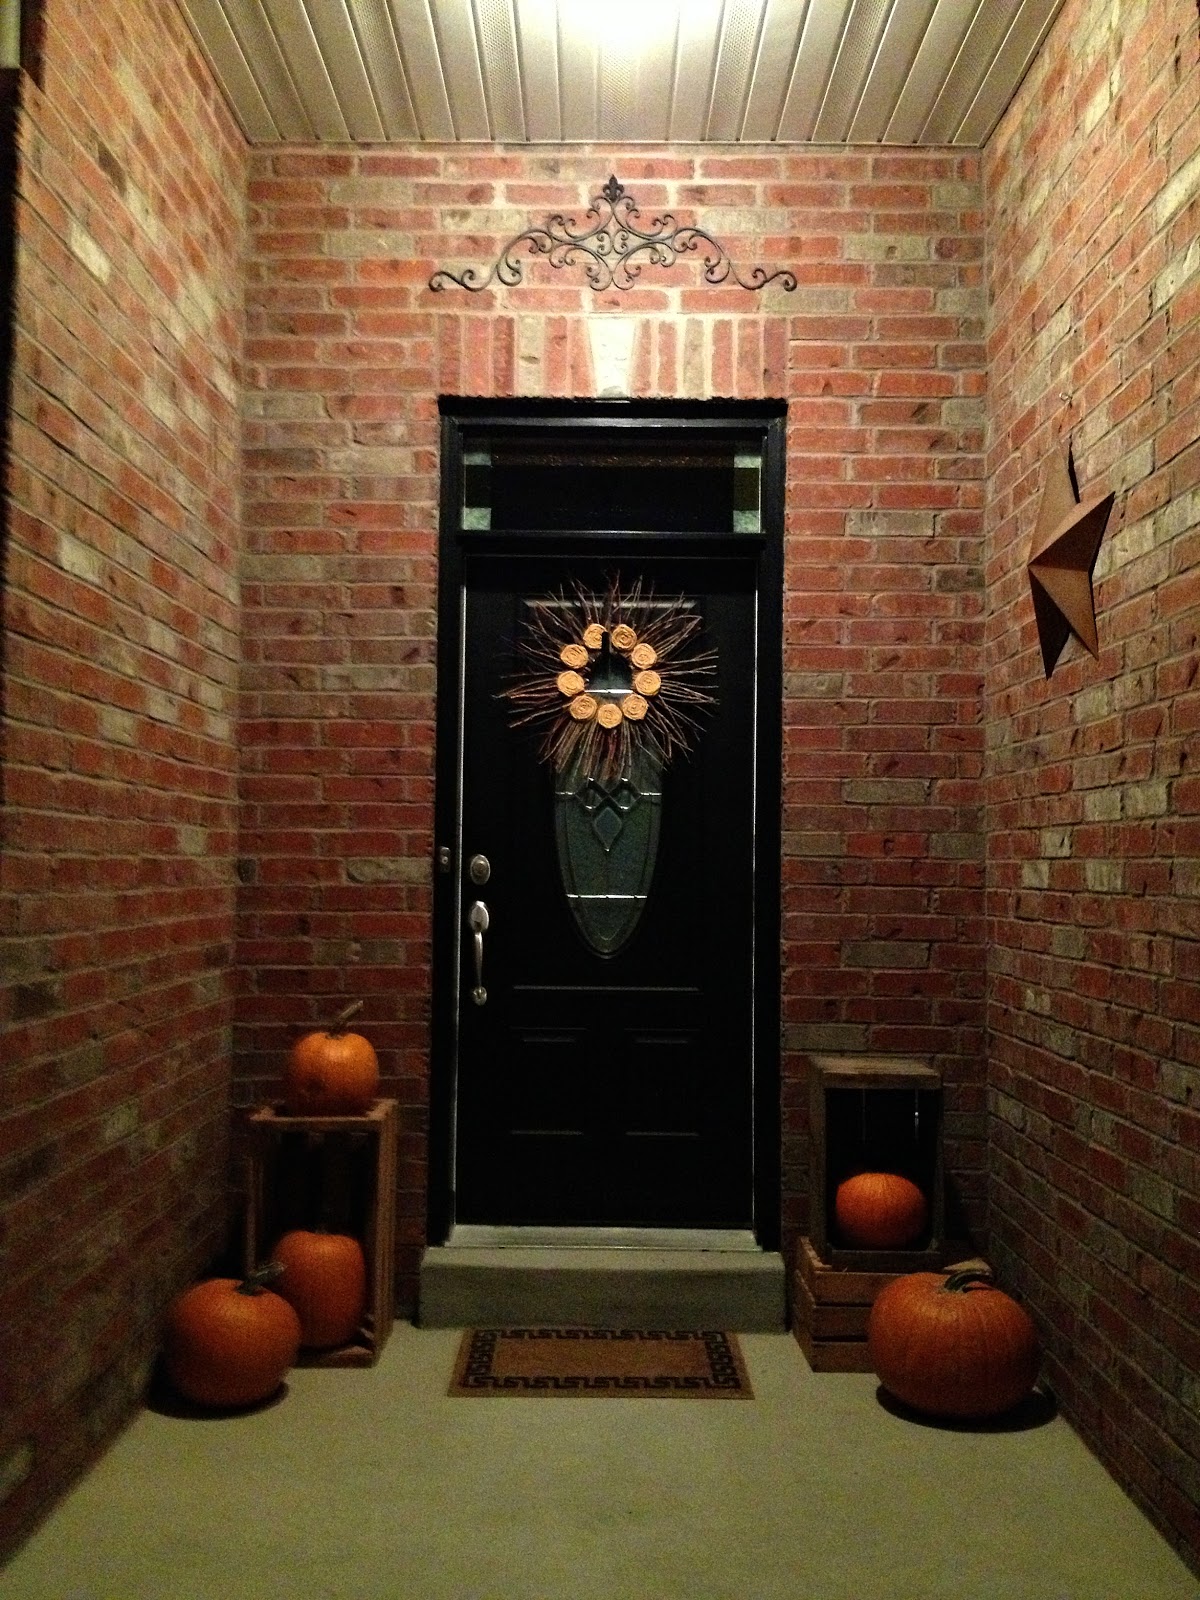
Here you have the left side of the door–and–the right side of the door.

[Just so you know–I didn’t post a pic of the entire front porch intentionally. I’m saving that really big deal for another post.]
I found this on Pinterest and think it’s a lovely way to finish today’s post.

Happy October 10th.

what do you think?