You’ve got to pick a project or two
In the ongoing effort to see more of the floor in my craft room (and considerably less of what’s covering it) I wanted to finish a project–today. Today–so it had to be a quick project (for me that means under an hour).
Which quickly eliminated 78.32% of the projects available.
~smile~
But something caught my eye–and–ta-da! Project picked.
(This has altogether nothing to do with the project–but the title of the blog comes from this musical–Oliver. It’s a fantasic clip. You’ve Got to Pick a Pocket or Two)
Back to the project at hand.
I love this skirt–the ruffles, the sass-a-frass, the length.

It’s fabulous.
And these skirts are comfortable. (I’ve tried a few of them on just to make sure it’s something I would actually wear once it was made.) Fabulous and comfortable?
BoOm.
But not in black. I have enough black skirts for now. Something different. And not more than $25. (There wasn’t a skirt deadline, so I could wait until I found exactly what I wanted.)
My project: a speedy-fasto skirt.
[Unless for some inexplicable reason you want to find a piece of fabric and add the 100 billion rows of ruffles yourself. In that case it would not be a speedy-fasto skirt. And you would likely put yourself just three strides shy of being smack dab in crazy.]
Seriously, it’s a one seam skirt with an elastic waistband. No pattern–just genius.
~grin~
Here’s what you’ll need:
––pre-ruffled fabric

I have Pinterest to thank for finding this fabulous piece–it’s sold by the yard, which means you can’t purchase a 1/2 yard piece–you can buy 1 yard or 2 or 3 or — well you get the idea. Super helpful note: if you have an 18″- 49″ waist and measure 36″ or less from your waist to the floor, 1 yard will be plenty.)
[Okay-if you actually have an 18″ waist, you are likely 3-years old and shouldn’t be using a serger or even pins for that matter. Or be on the computer. That is all I am saying.]
—elastic for the waist
I personally like a 3″-wide elastic for this type of skirt because it doubles as the yoke in addition to being a waistband. It’s also available at www.rufflefabric.com — and it’s also sold by the yard — I purchased one yard.
—a measuring tape
—thread
—pins
—rotary cutter and board
You’ll also need two basic measurements: your waist (or wherever you’ll be wearing your skirt–I measured halfway between my waist and hips), and length (as in the length of your skirt–it will help to know which shoes you’ll be wearing it with).
For the math of it, let’s say that your waist is 26″ around, and you need 35″ in length.
Take your waist measurement and add 4″ (in this case the total would be 26 + 4 = 30″).
Lay the material out on a flat surface (make sure the ruffles are all headed in the same direction). We’re cutting width first.
Just for clarification: the width measurement would be from the left side to the right side of the material in this photo — or along the path of a single ruffle. The length measurement would be from the top of the material in this photo to the bottom — or down/over all of the ruffles.
Yes?
I hope that was clarification and not confusification. ~smile~

Measure your total width (it was 30″ for the 26″ waist).
Measure 30″ from the side in several places down the length of the material–I used chalk to mark it. It worked excellently.
Now you’re going to cut. A rotary blade works quickly and precisely–not like a surgeon precisely–but precisely.


Serge the seam (I allowed for 1/4″ seam on mine–I could have sewn a 1/2″ seam and it wouldn’t have made any difference).
Admire your work only briefly–but do admire it.
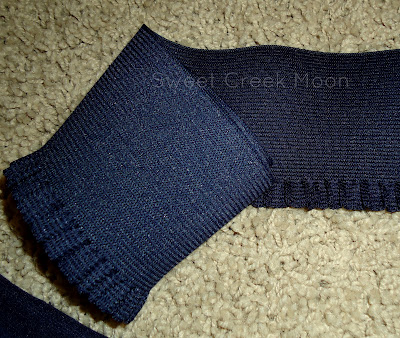
Now you need a waistband. Cut a piece of your elastic that fits the way you want it to — I just wrapped the elastic around my hips (or wherever you’ll wear the band), marked it with a piece of chalk, and added 1/2″ (for the seam).
And look! There’s a convenient little edge to sew the waistband to at the top of the material.


4 COMMENTS
Jami
12 years agoOh my word, it seemed too complicated to even read the whole thing! I absolutely love it though!!! So pretty!!
Teresa Jones
12 years ago~sigh~ I tried to make it so that someone could simply look at the pictures and know what to do. Maybe I should modify the whole process. Hmm. I didn’t want it to seem complicated. It took me 45 minutes to make it. For real.
Granny Spike
12 years agoThis is going to happen as soon as I can get to my sewing machine. It is currently blocked by my daughters boxes that contain her household. She is moving in 6 weeks, maybe I can make a couple for the girls and I and call it Christmas!!!! Have I mentioned that I LOVE your blog. I am totally unblogworthy. You put me to shame! Love you
Teresa Jones
12 years agoI would love to see pictures of your finished skirts. They are sure to be adorable! And unblogworthy, my eye. =0]