Cardigan for President
Cardigan for president
Cardigan for president merely means that if it’s ever on the ballot, that’s where my vote is going. There aren’t enough closets, or storage sheds, in the world to hold every cardigan I’ve ever wanted to own.
I love cardigans. Love them.
This particular cardigan needed one small modification: half sleeves.

#2–Cut the knit cuff off of the end of the sleeve. (I cut 1/4″ above the ribbed knit cuff.)
And I always (as in EvErY SiNgLe TiMe) put one hand inside of the sleeve end while I’m cutting to help prevent me from unintentionally snipping the other side of the sleeve.
Unintentional cutting can ruin a perfectly fabulous project.

Ta-da.
#3–Cut the cuff off of the other sleeve. ~smile~
#4–Cut one sleeve to the preferred length.
There’s a stripe on this fabric which just means I cut through a single layer of fabric along the stripe all the way around the sleeve. The other option would be to cut through both layers of fabric at the same time–which I generally do–except when there’s a stripe to follow.
It doesn’t matter where you make that cut–mine is 1/4″ above the stripe for no magical reason–as long as you remember to cut the other sleeve the same length, which brings us to
#5–Use that piece to measure the other sleeve. And cut.

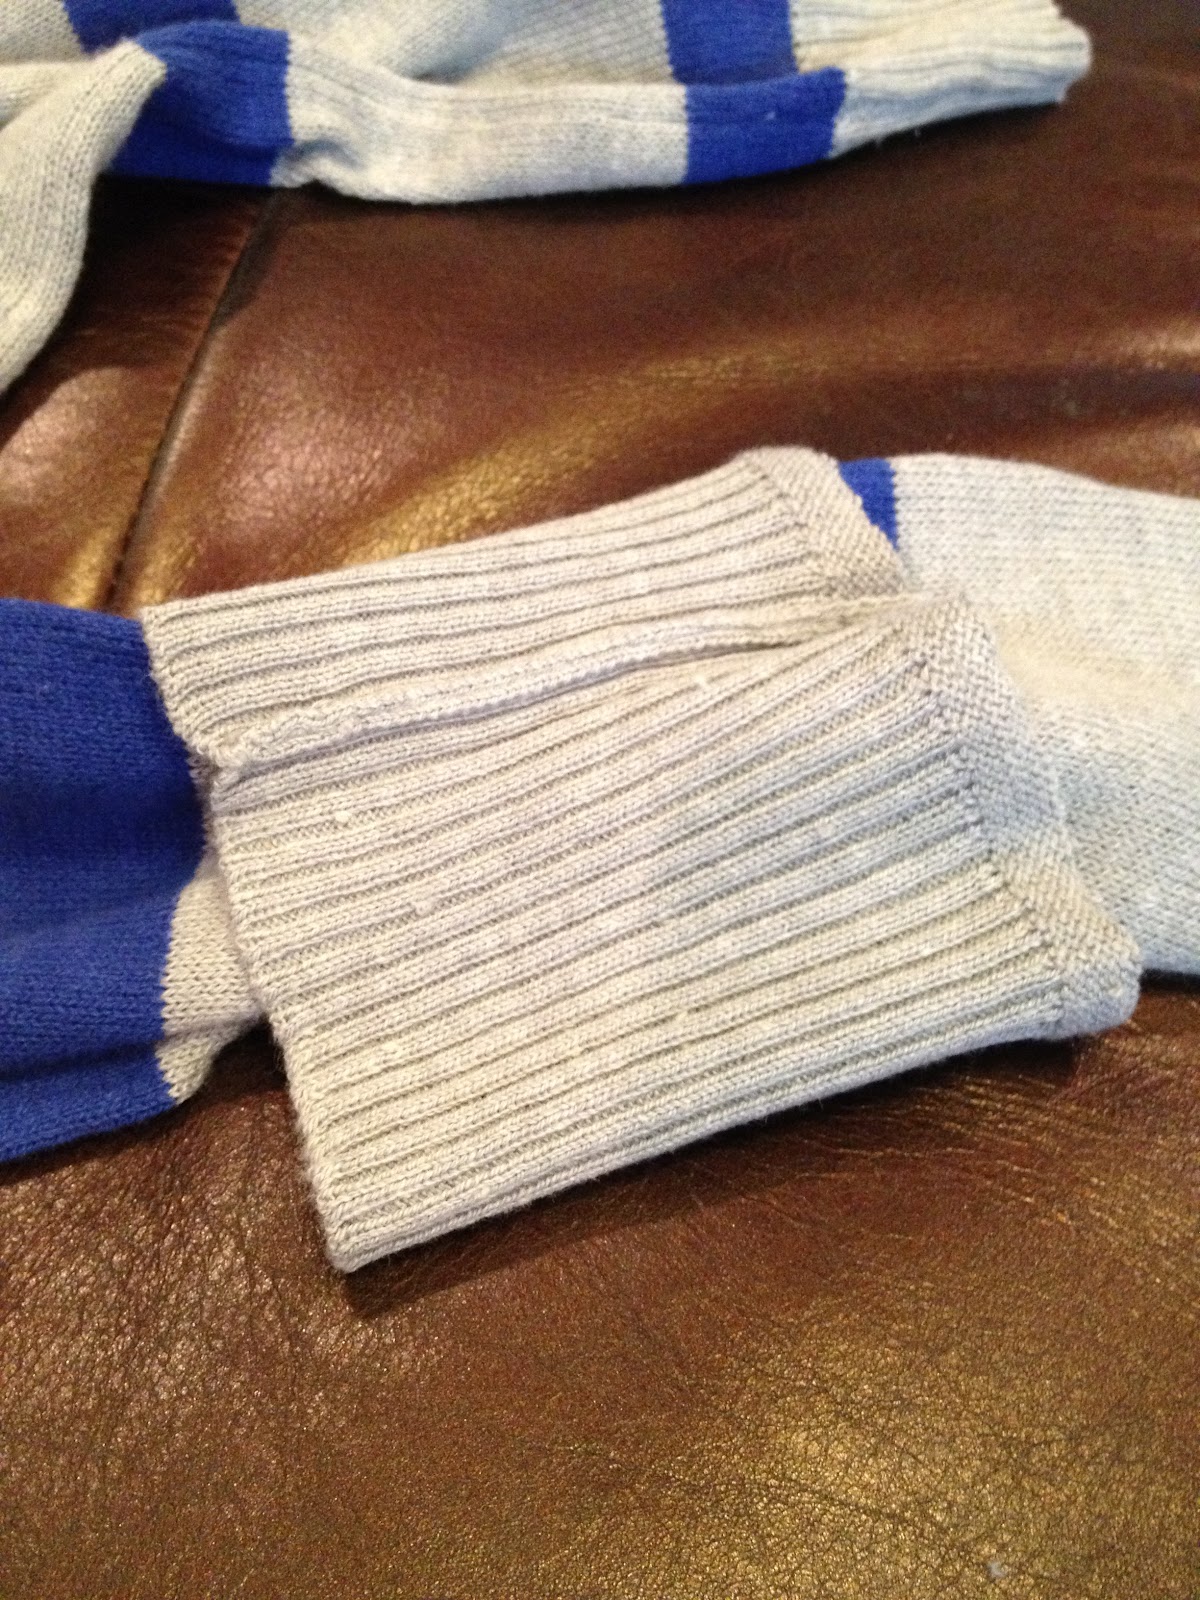
#7–With right sides together, pull a cuff over the end of one sleeve.

#8–Line the edge of the cuff up with the edge of the sleeve. Make sure the seams match as well. (The single seam on the cuff should line up with the single seam on the sleeve. Pin it.)

#9–You’ll need to stretch the material ever so slightly for the sleeve to fit inside the cuff. But it works.
#10–Serge the seam.


#11–Repeat everything from #7–#10 for the other sleeve.
Tun-tun-tun-tuh. (A little trumpet fanfare is always nice.)


12 COMMENTS
Laur
12 years agoCute cardigan and great tutorial! Your blog is great:)
Teresa Jones
12 years agoThank you!
Katherine Freeman
12 years agoI did something similar the other day, except it was with a blazer, not a cardigan. It seems as though you feel the same thing for cardigans as I do for blazers 🙂
Teresa Jones
12 years agoI would love to see the blazer–way to go. =0]
Jonie Marie
12 years agoFabulous tutorial! Love the step by step photos, and it is really easy to follow. The cardigan turned out so cute too! Good work. 🙂
Teresa Jones
12 years agoThank you, Jonie.
grammanews
12 years agolove it Teresa. I have the smooshed up sleeves and will do this to some of my cardigans. thanks .
Teresa Jones
12 years agoIf you have any questions, please let me know. (fyi-it takes about 15 minutes to complete a sweater from cutting to serging.)
Jami
12 years agoMan, it looks like if you have a surger you can do anything. Aren’t they scary to thread? I love seeing what you come up with!!
Teresa Jones
12 years agoThe older machines used to be beasts to thread–however–the newer machines are fabulous! We should have a project day at Bonnie’s. ~grin~ Please feel free to tell her I said that. HaH!
Jami
12 years agoSerger sp?
Teresa Jones
12 years agoYes, ‘serger’ is correct.