Valentine bunting 2015 | Jan 24
Valentine bunting — 2015
Do you decorate for Valentine’s Day?
I don’t do a whole lot except have copious amounts of extra love in my heart — except for this year.
This year, I decorated a bit.
I’ve kind of fallen in love with buntings in the last several months.
Buntings are about the simplest thing you can create to add a touch of sweetness, elegance, or whimsy to just about any spot in the house.
[I don’t know that a bathroom bunting would be so fabulous–but–I’m sure they can be made.
Bits of toilet paper.
Pieces of soap.
Tiny toilet plungers.]
Okay. Now I have to make one.
No.
I really don’t have to make one.
And certainly — very much please, please — let there be no one among you reading this and fighting even the tiniest bit of grrrr.
Because if you-ou-ou happen to have a bathroom bunting…
Hmm.
Alright.
I’m just going back to talking about the Valentine bunting.
It’s beautiful.
It’s simple.
Here’s what you’ll need.
Paper, burlap, lace/string/ribbon, Fray Check, glue (liquid or hot glue), and a sewing machine.
Paper.
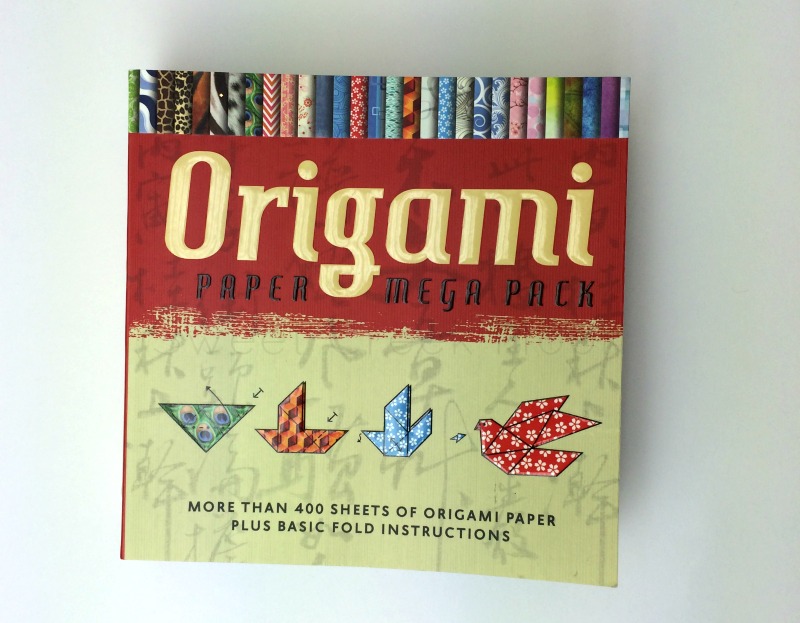
I purchased a book of origami paper that worked perfectly.
Here’s why:
1–there’s a huge variety of patterns
2–the paper is thinner which saves my machine needles
3–it’s easier to work with
4–it was on sale
Win. Win. Win. Win.
Burlap and lace.
[That would be a great moniker for something if it isn’t already.]
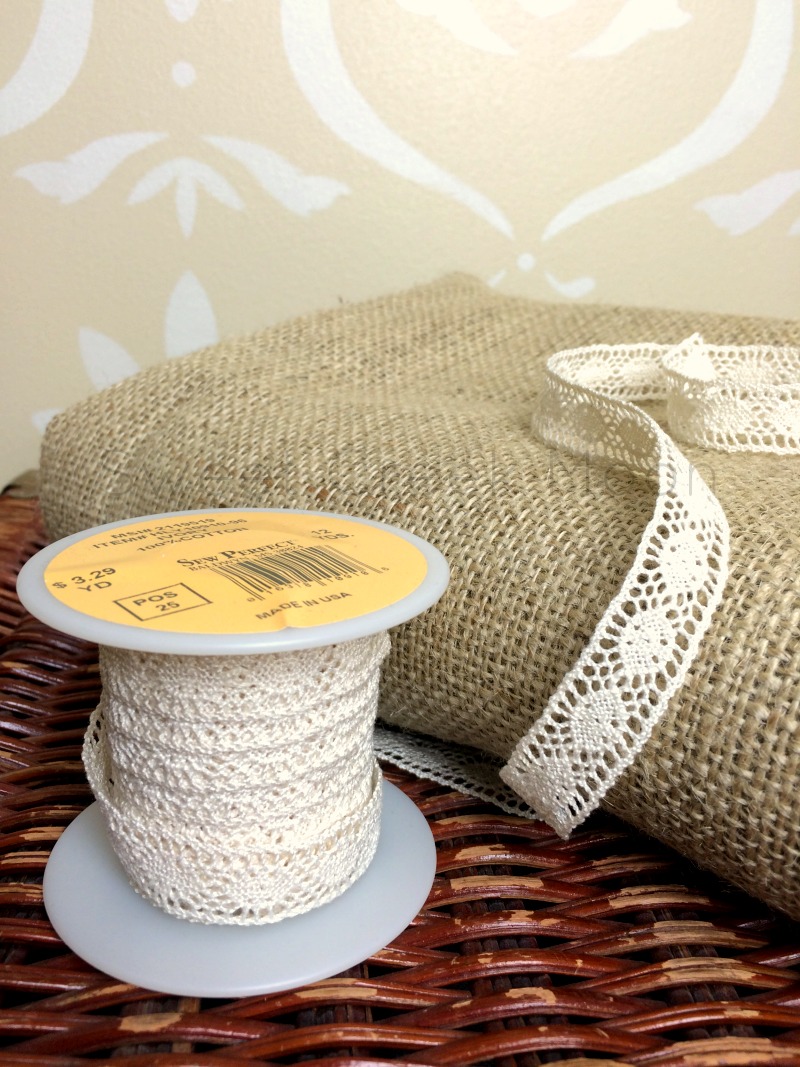
I’m always on the lookout for fabulous lace at equally fabulous prices.
It was 25 cents/yard.
I know, right?
[Insert a look that includes wide, sparkling eyes here.]
Fray Check and glue.
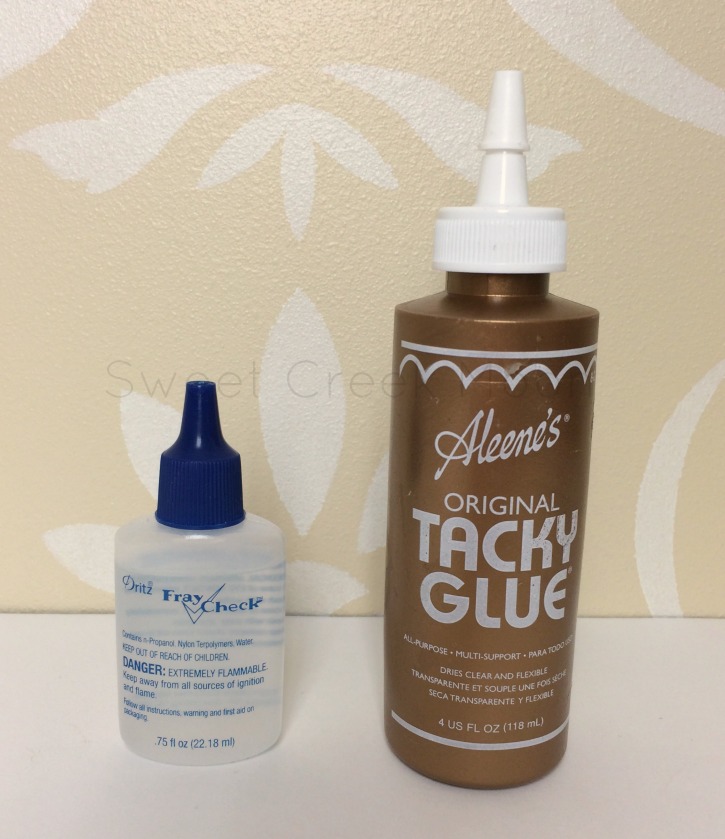
It’s not going to matter if you use some kind of crafting glue or hot glue.
[Unless you’re in a hurry–scurry to complete the project.
Then you’ll vote for hot glue.]
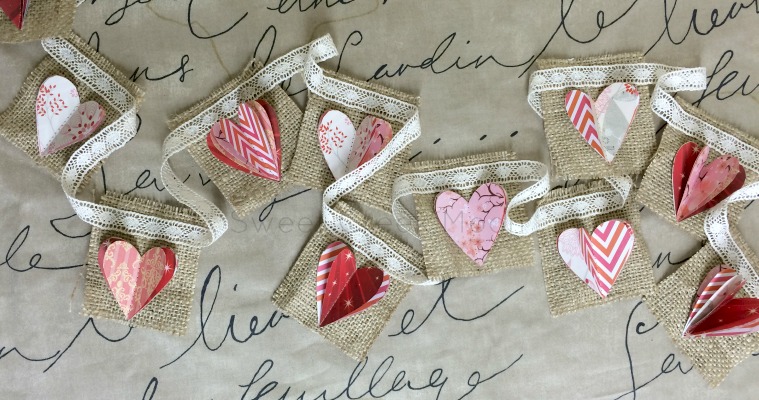
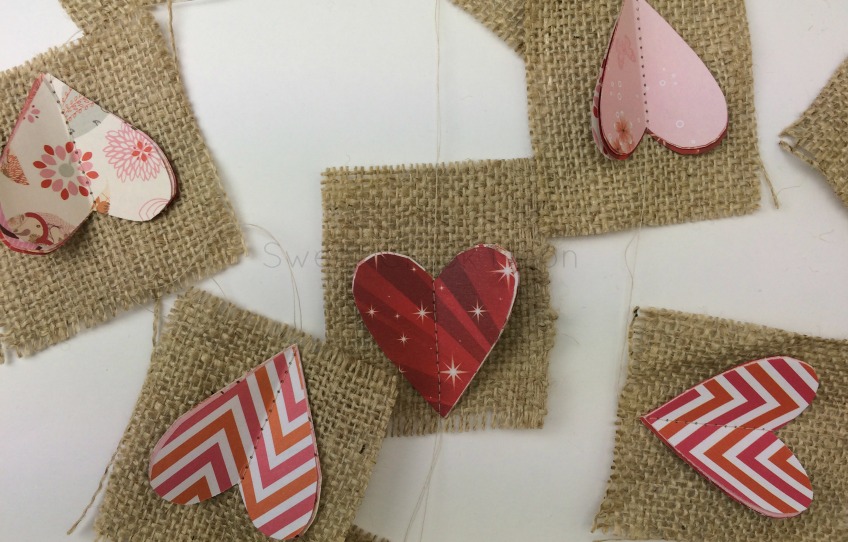
After you have your materials laid out in front of you, you’ll need to decide on the size of the rectangle and the heart for your Valentine bunting.
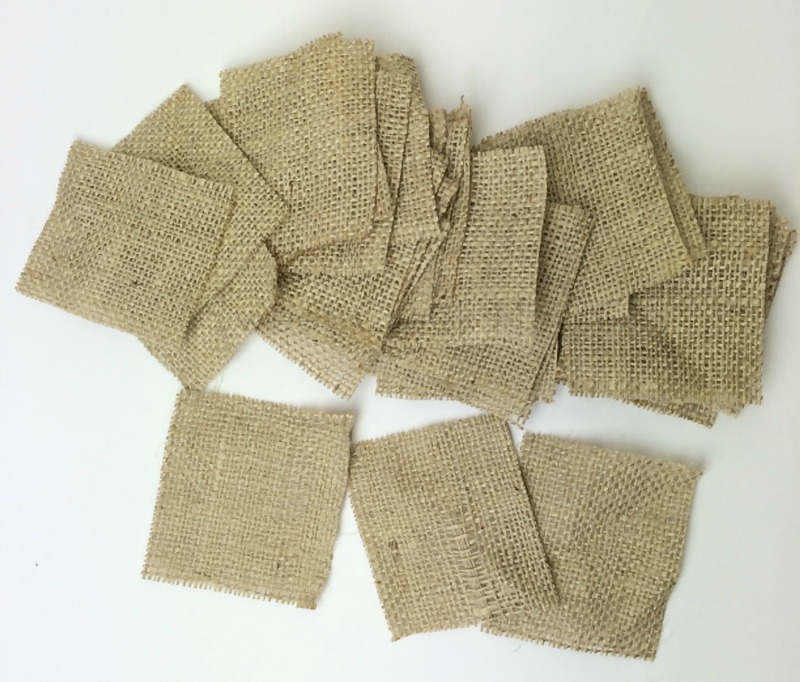
The burlap for mine is 3 1/2″ long x 3″ wide.
There are 18 individual pieces of burlap on the Valentine bunting.
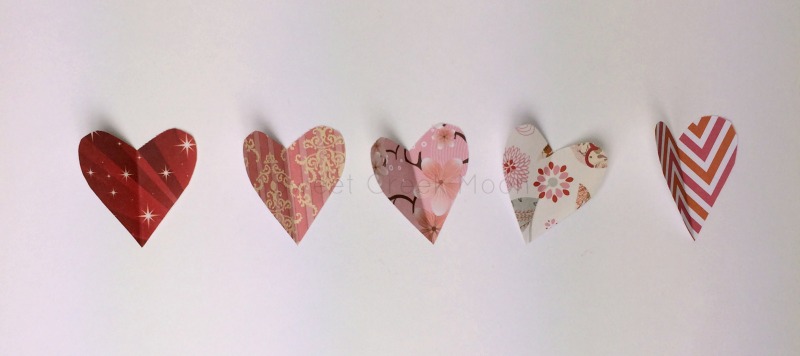
The heart is 2″ long x 2 1/8″ wide.
[Simply cut out hearts until you like what they look like in the space on your burlap.]
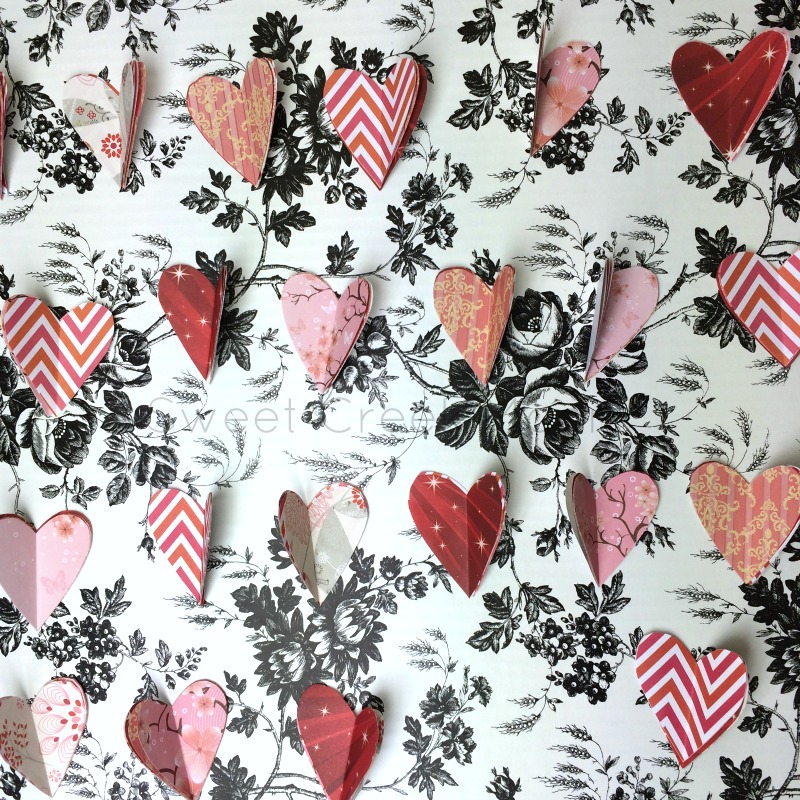
I used five different patterns of paper.
Each piece of burlap has four hearts.
Total hearts cut: 72
Now you’ll need to stack the hearts.
Once there are 18 piles of 4, you’ll sew them to the burlap.
Tip: put the 4-stack hearts in the order you want them on the bunting.
Move the hearts around until you like what it looks like.
I arranged mine on a piece of cardboard that was covered in shelving paper because it was handy — not because it was special.
~grin~
The arranged hearts were placed on the tall garbage can in the craft room — to my right.
The stack of burlap was on my left.
It worked for me.
YOU do whatever works.
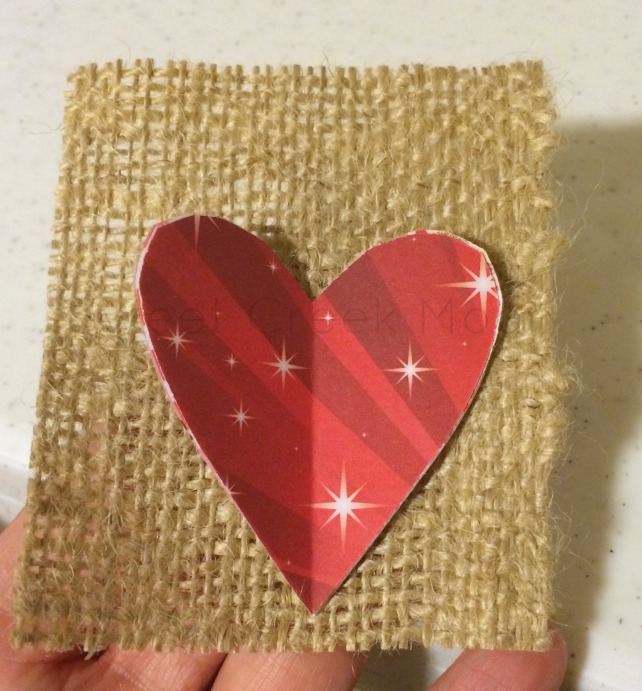
When placing the hearts on the burlap, make sure you’ve already decided where you want your lace/string/ribbon to go.
I wanted the lace on the front of the bunting and above the heart;
[Which meant I would sew the heart closer to the bottom of the burlap than to the top.]
Use a large standard needle [at least an 11] and the longest stitch on your machine–the basting stitch.
Consider leaving the threads attached to each heart in a long string of hearts instead of cutting the thread.
I didn’t backstitch.
Just so you know.
It saved a bit of time and kept the hearts in the order that I’d previously arranged them for the Valentine Bunting.
At this point, you’re just about done.
Eat a cookie.
[Constantly rewarding myself with food is super healthy. Who needs a puppy?]
Next step.
Fray Check and gluing.
You don’t even need to use Fray Check — you can use glue.
[Not hot glue, though.]
Burlap is going to fray.
It’s part of the charm.
However, sometimes it frays too much, which is why I’ll dot the edges with Fray Check.
“Dot” is the key word.
It’s not a labor intensive exercise and it certainly doesn’t prevent all frays.
[It does mean that it won’t be frayed to nothingness before I hang the bunting.]
Skip the step if you’d like.
You’re the boss.
Cut the strings off, making sure you keep them in the order that you placed them in the first place.
Now attach the lace/string/ribbon.
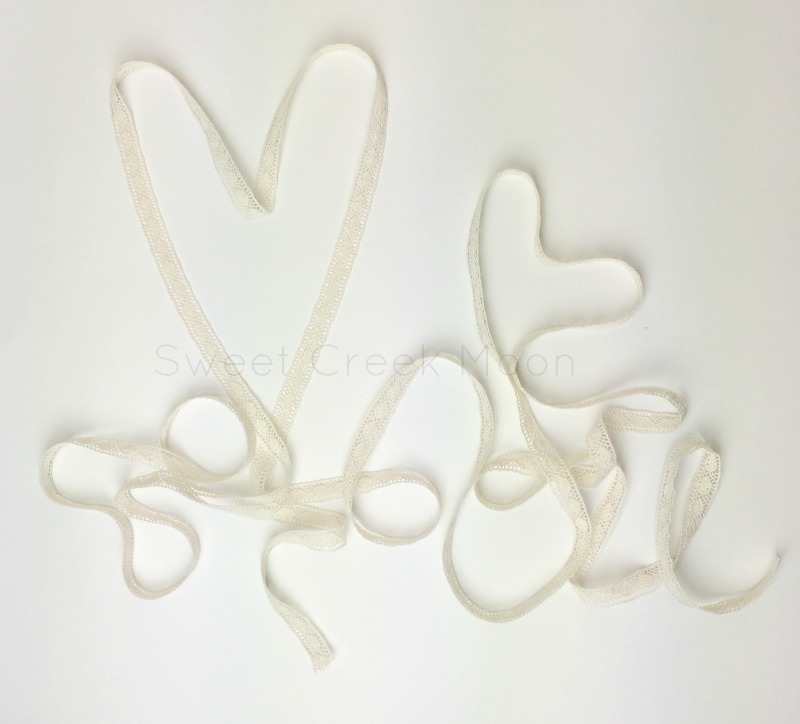
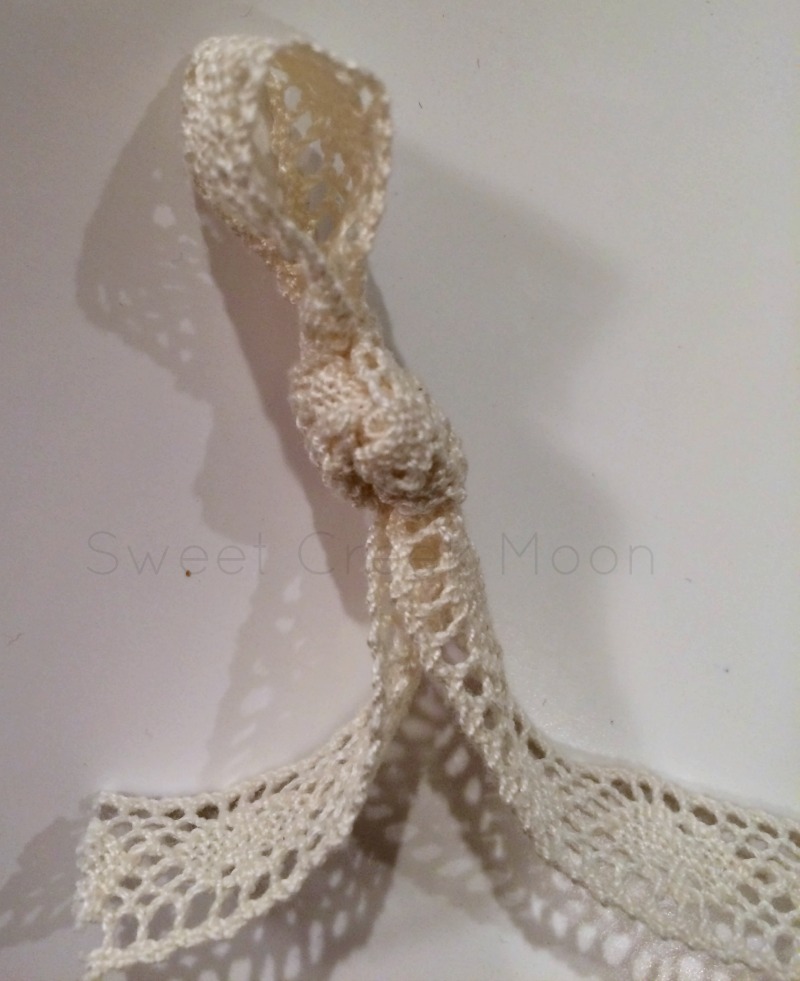
Tie a knot in the end first to help with hanging the bunting.
I made a little template to help with the distance between the hearts.
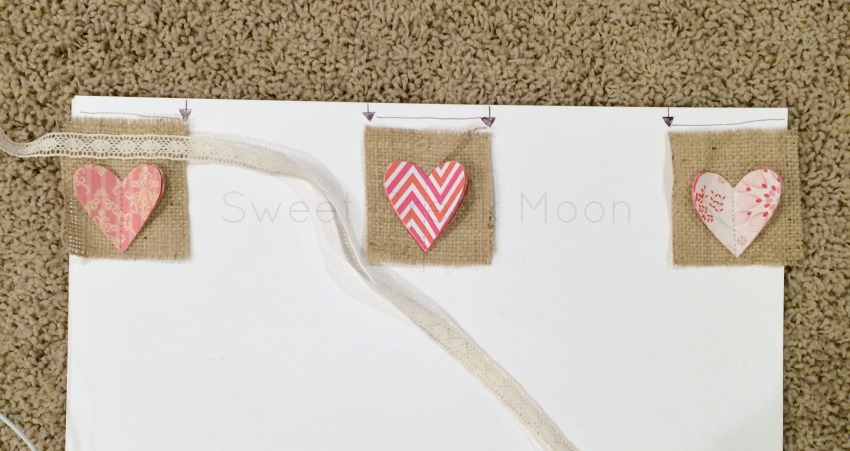
Not a necessity and it’s fairly simple to ‘eyeball’ the distance.
Leave some space between the knot and your first burlap piece before gluing.
Once you’ve laid out two or three of the burlap pieces, glue, glue, glue.
If you’re using hot glue, don’t burn yourself.
[Use another glue stick to push the lace/string/ribbon against the burlap.
It will save your fingertips.]
You’re welcome.
When you’ve reached the end, tie another knot about 6″ from the last burlap piece.
You’re done.
Eat a cookie.
I’m kidding.
Unless you want to.
~grin~
My Valentine bunting ended up being 9′ long which is perfect for the stretch of wall that I wanted to hang it from.
If you want to hang it on your mantle, don’t make it 9′ long.
Which means you can use less of everything.
[Maybe instead of a cookie, I’ll just dance.]

what do you think?