You put in the details
It’s Thursday. It’s a Thursday in the Month of Thanks and Giving.
I am grateful to have the good fortune of associating with some really extraordinary people.
Including these two: Ashley and Emi.
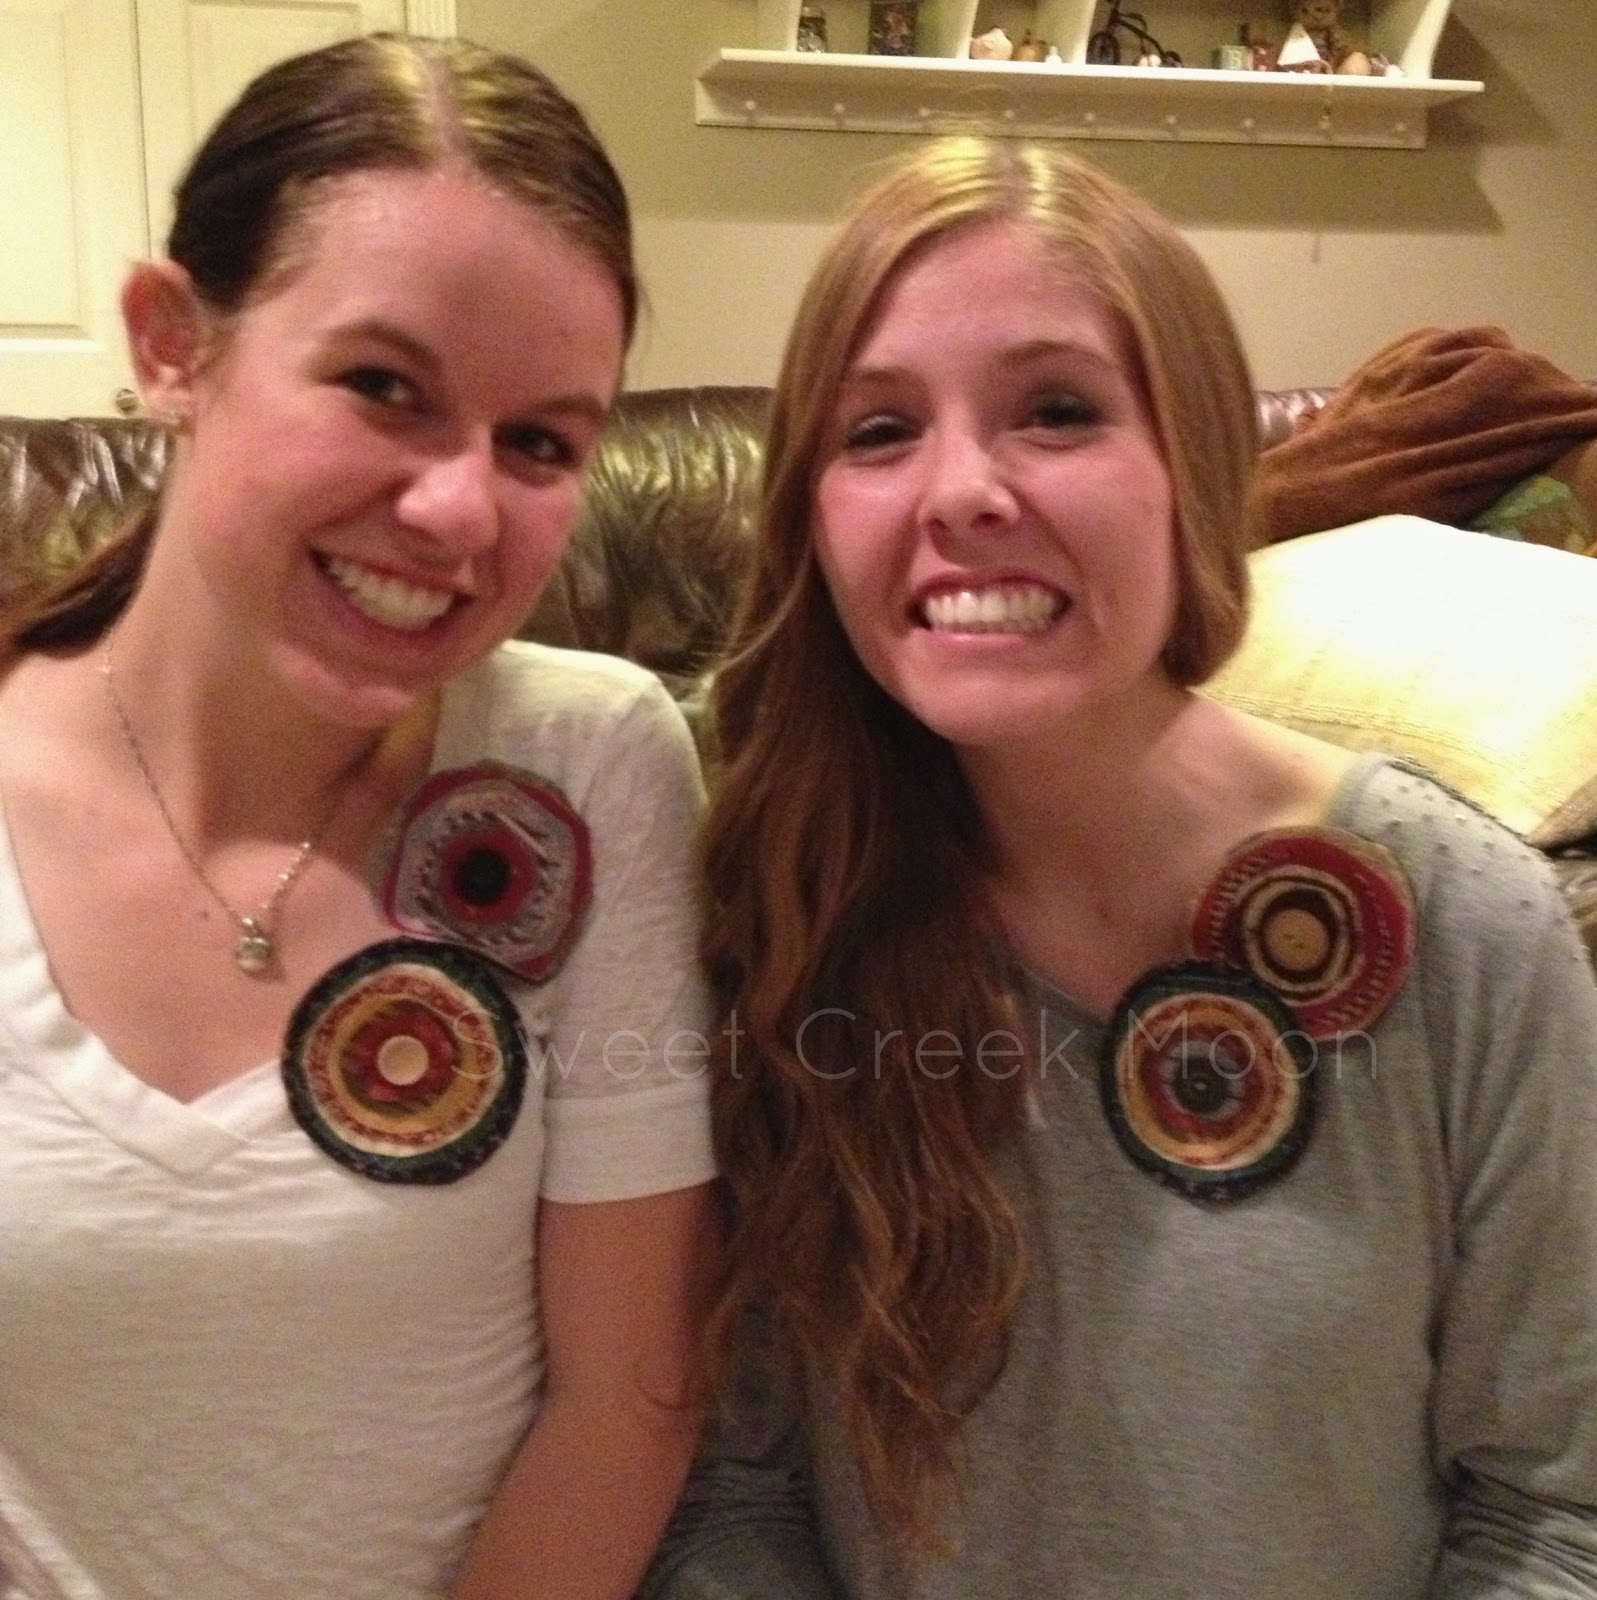
They don’t generally wear two (each the size of a small plate) broaches/pins/cute thingies–but–they were modeling our finished really quite darling craft projects.
I found this picture on Pinterest:
The site has a few basic instructions–which is all that you need.
[Well–that and love.]
~snerk~
There are nine layers on the pin. Plus the button.
Materials:
–8 (as in the number of fingers you have excluding your thumbs) different pieces (they don’t need to be very large pieces) of fabric
[I am feeling a little bit sassy-pantsy right now. It might be safer for you to stop reading this post. Consider it. Aaaaand this little spot of information I’m typing this very moment will be proof that I warned you. You know–about the sassy-pantsy situation.]
–scissors
–felt
–a button
–a needle
–some thread
–a pin back/a clip-thingy (I attach both because I live a little bit dangerously)
–a glue gun
–two very cute friends (to be frank, I don’t have any other kind) to make the project with
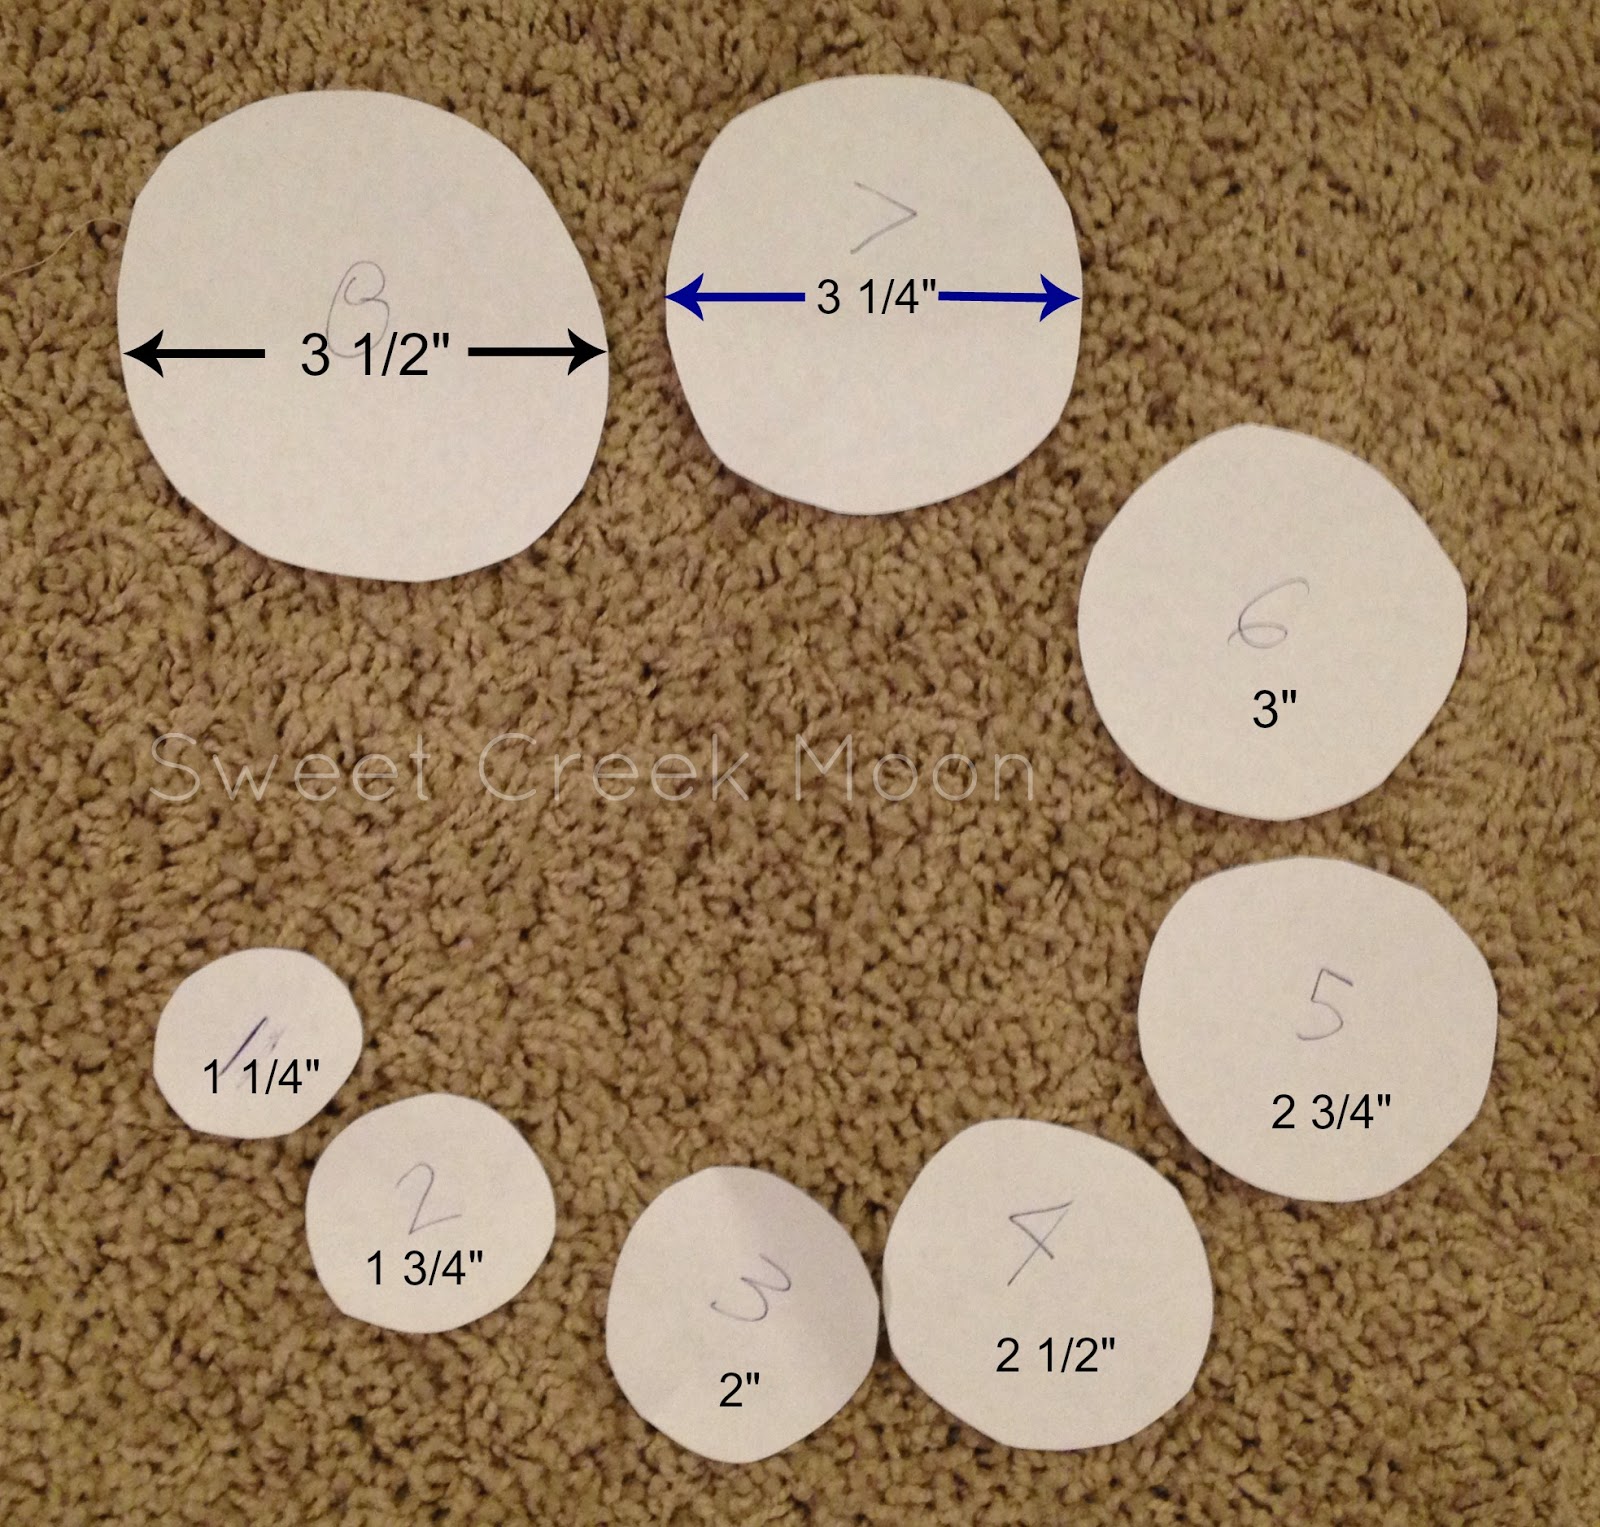
You see eight circles because you use the largest one twice.
The circles aren’t perfectly round.
You just cut them whatever size your heart desires.
[Keep in mind that if you use a dinner plate for the smallest size, you will be using a circle the size of a tractor tire for the largest size. It will not be an attractive broach/pin/cute thingy. At all. The upside to this interesting scenario is that your entire family will be able to seek shelter from the wind if you wear it.]
I numbered the circles because I wanted to.
[The sassy has obviously not been remedied.]
The measurements are there because today is one of the days of the giving month–and I just figured someone would consider it a bonus.
Instrucciones:
[It is my dream to reach a multi-cultural audience.]
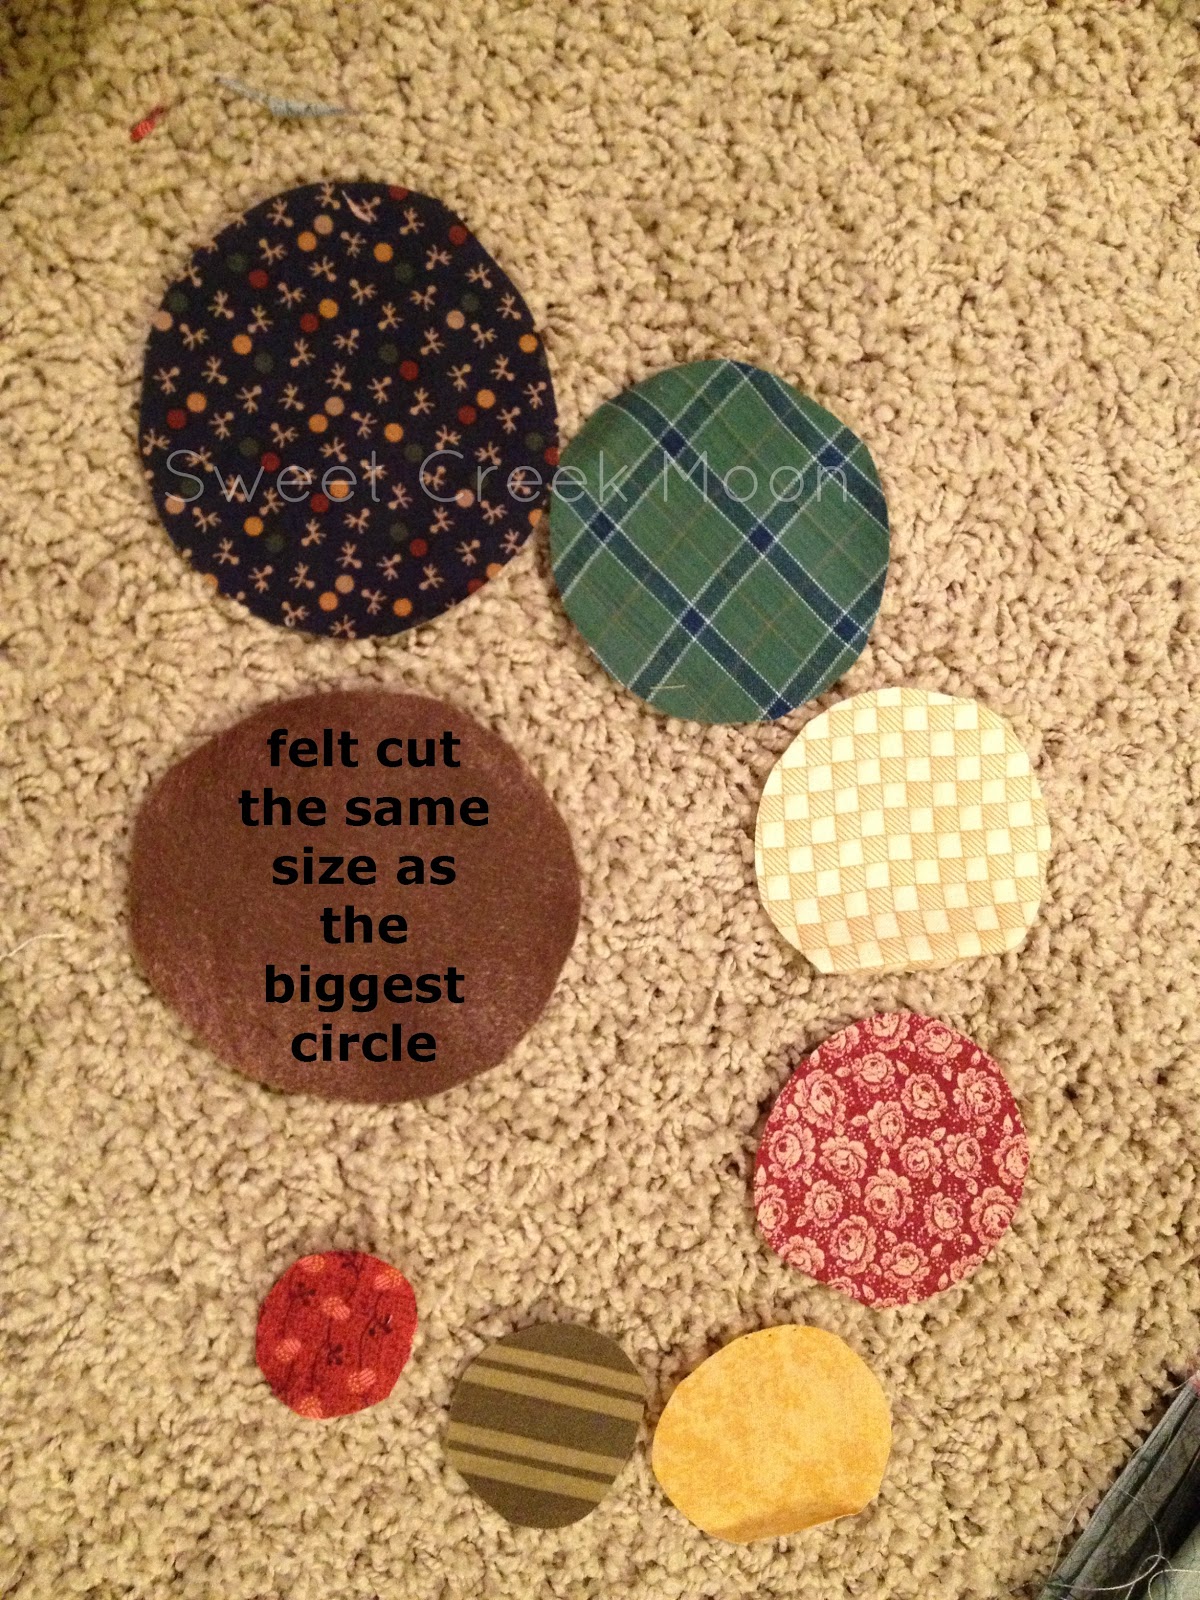
–Cut out eight little-to-littler-to-tiny circles, one from each piece of fabric.
–Cut out one piece of felt that is the same size as the largest circle. (Which would mean using the number 8 circle twice if you were referencing the above photo–once for the felt circle and once for a fabric circle.)
Here are my fabric circles and the felt circle.
So far so easy-breeezy-cover-girl, right?
–Stack the circles, beginning with the felt piece. (Place #8 on the felt piece. Place #7 in the middle of #8. Place #6 in the middle of #7. Etcetera. Etcetera.)
Stack-o-rama.
–Thread the needle from the materials list with the thread from the materials list.
–Grab your stack of colorful circles taking care that they are situated as you like them.
–Sew an X right smack dab in the middle of them all.
–Sew on your button. (Contrasting thread is cute.)
–Attach the pin back/the clip thingy (I used a 1″x 2″ piece of felt to glue mine to. It’s possible to simply sew them on by hand.)

Please notice the globby smudges of hardened hot glue.
~grin~
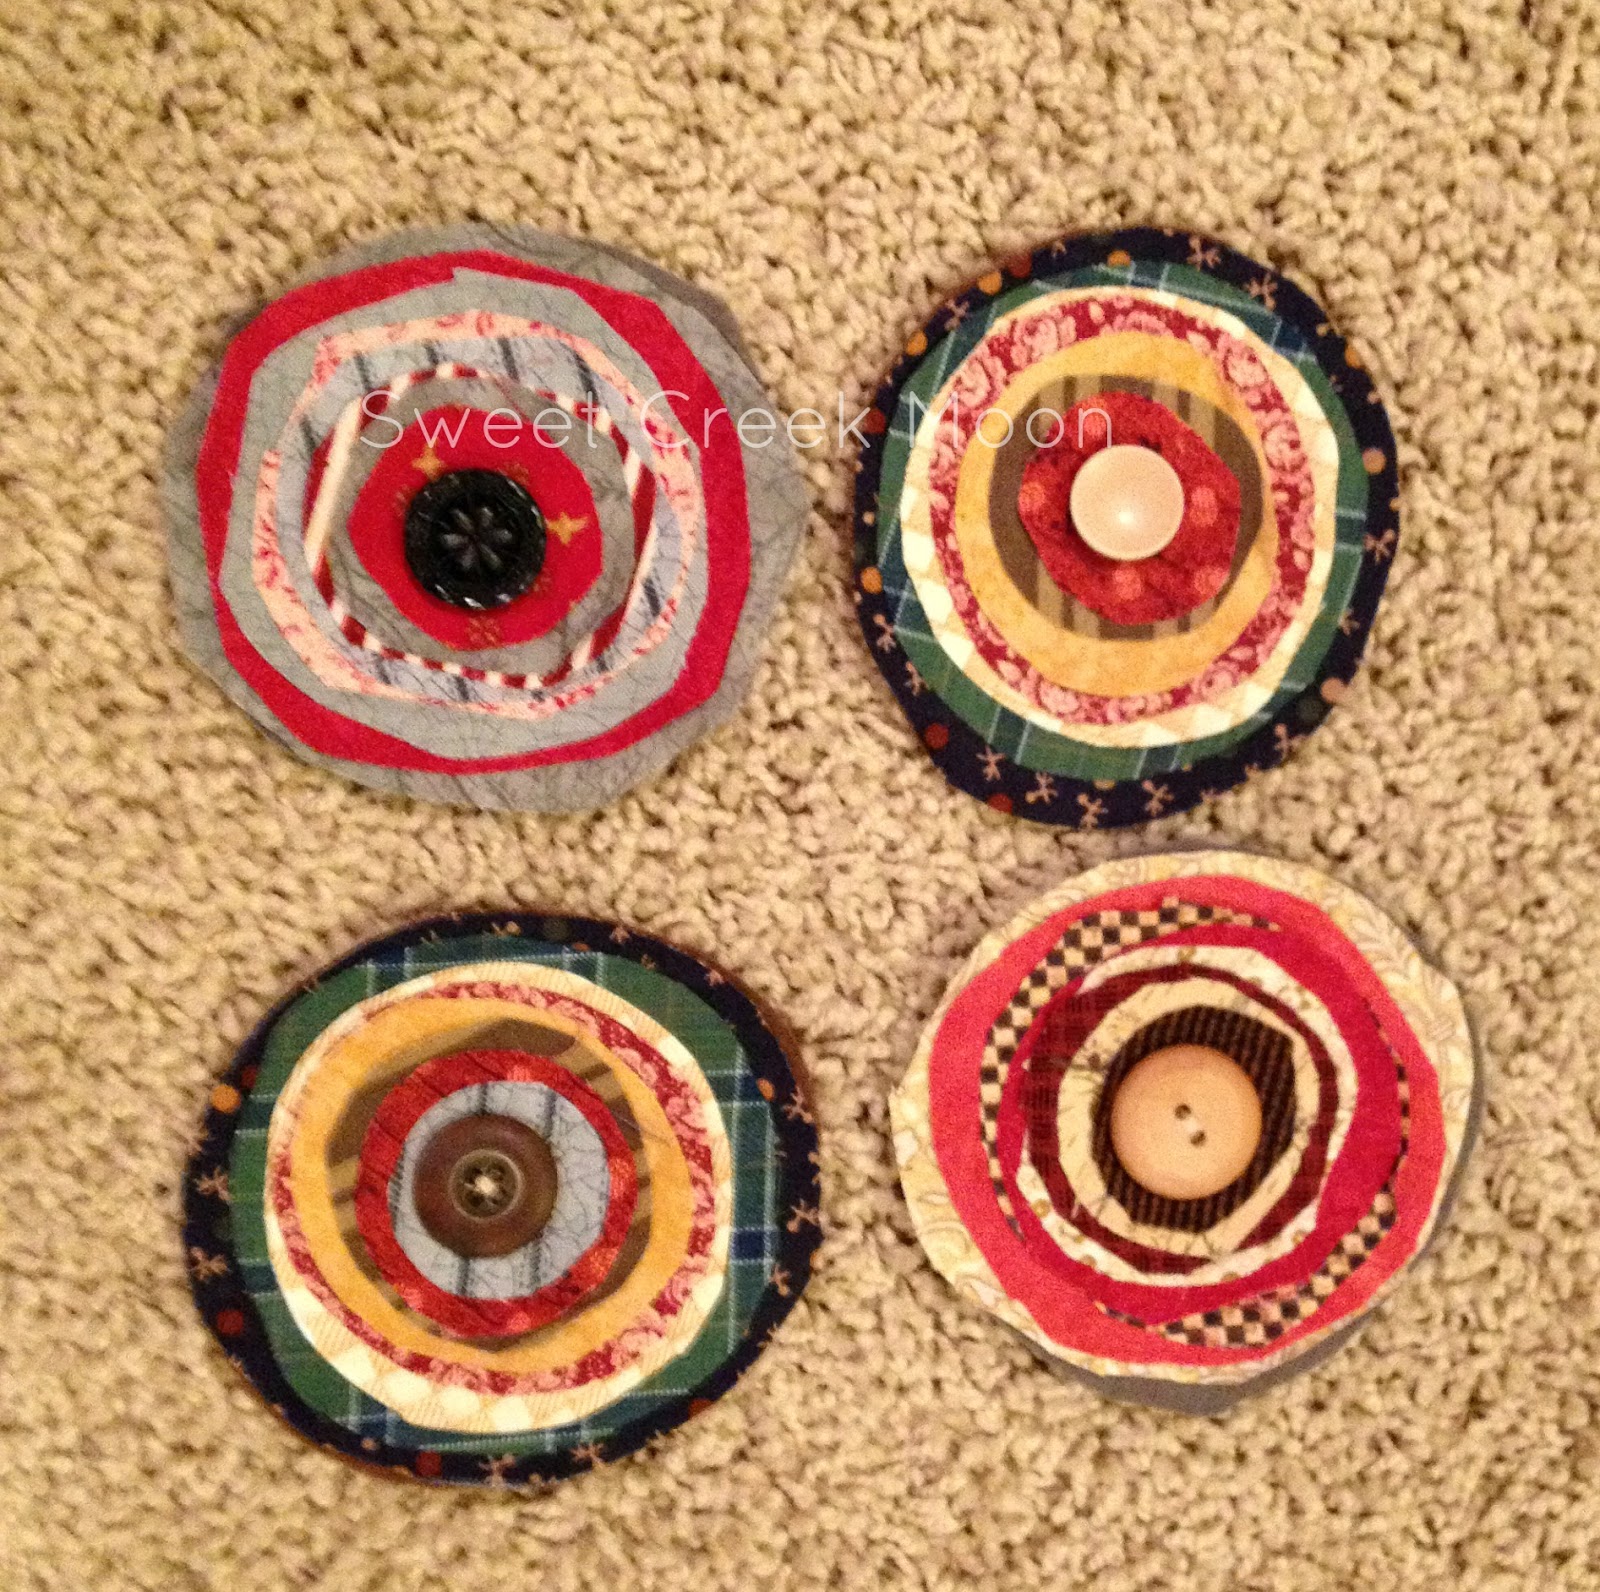
Now notice the four fabulous flowers we finished as we enjoyed the fruits of friendship.
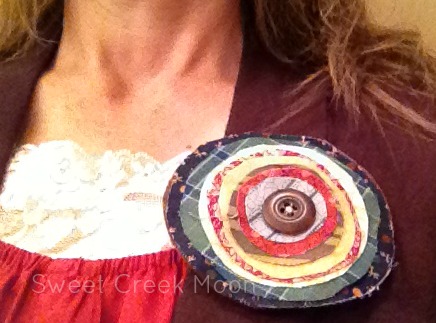
This is me wearing my practical Pinterest pin. You know–like I pinned the pin picture on Pinterest.
~smile~
You put in the details.
Happy Month of Thanks and Giving.

what do you think?