Halloween bunting
It’s a post with a Halloween bunting. It’s frightfully cute [the banner, not the post] if I do say so myself, which I do. It’s Halloween [nah–it’s after Halloween] and there’s not a single Halloween decoration to be found around here [not because it’s after Halloween, either] which is frankly not that big of a deal. For whatever reason–it’s just not a holiday I decorate for. It might be laziness. [It’s not, except okay–maybe it is.] There are several drawings tucked, stashed and piled away of a Frankenstein monster-dude that would have been taller than Handsome-Dude [he’s 6′ 3/4″ tall]. Mr. Monstor would have been cut from several pieces of wood and painted gloriously. Unfortuntely, he didn’t make it much past the paper stage. ~grin~ I’m going with lazy.
He would have been fabulous.
She’s certainly adorable–and 473 years old. Pthth. Who cares. My sister Bonnie luh-huh-huvs her.
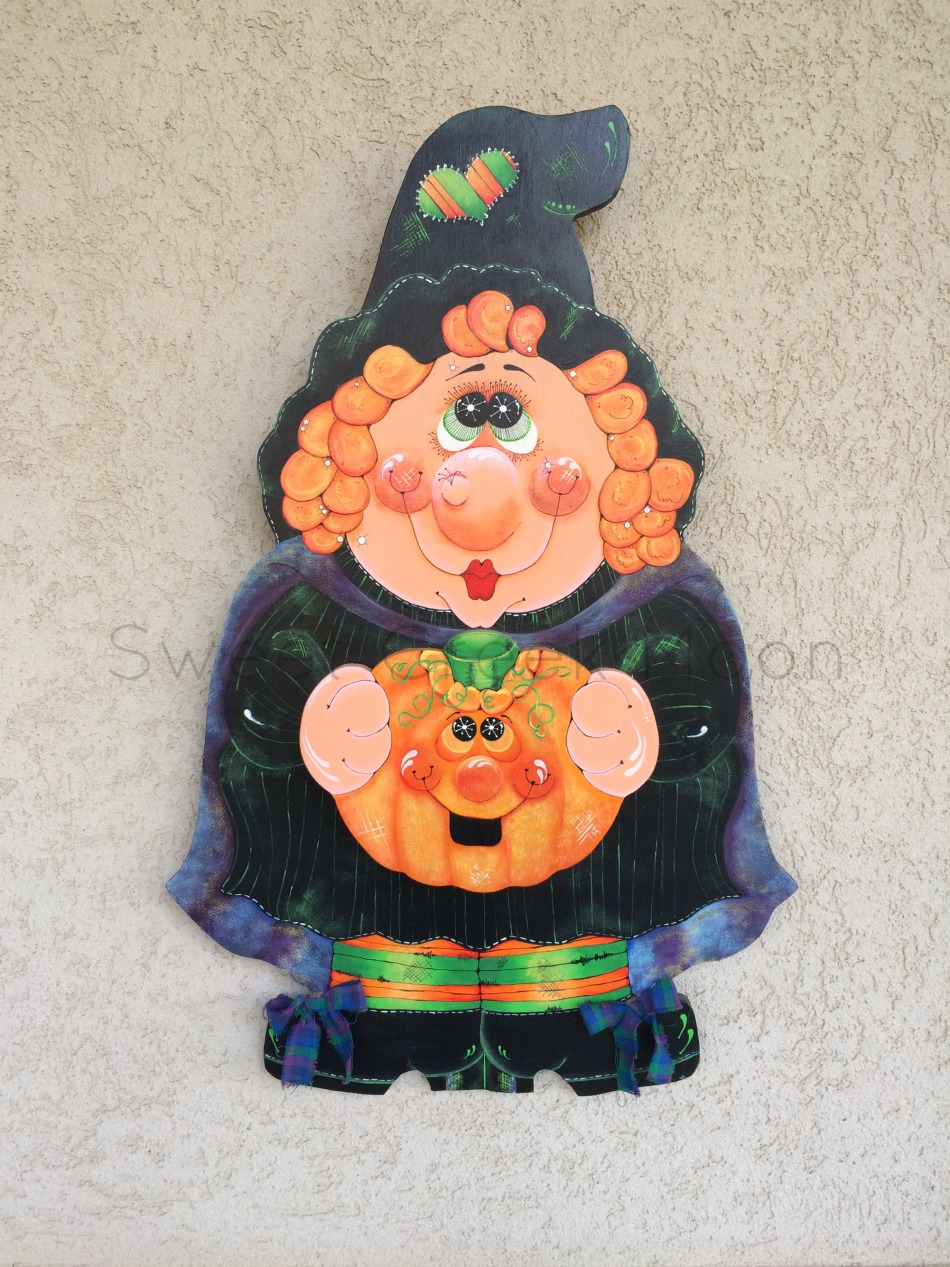
She’s about 1.5″ tall [Miss Witch–not Bonnie] and painted on a grain of rice which means I have a gift for details.
Those lips.
She’s actually almost 2′ high and there are oh-so-many-things I would do differently–but there she is–and not on a grain of rice.
Back to the bunting, shall we?
My favorite combination of color for any Halloween decorating is orange, red, lime green, purple, and black. Throw some yellow in with it–or some gray–or whatever–it’s not going to even matter–so long as the orange, red, lime green, and black are in abundance.
For example: Miss Witch.
For another example: this Halloween bunting I made for a friend.
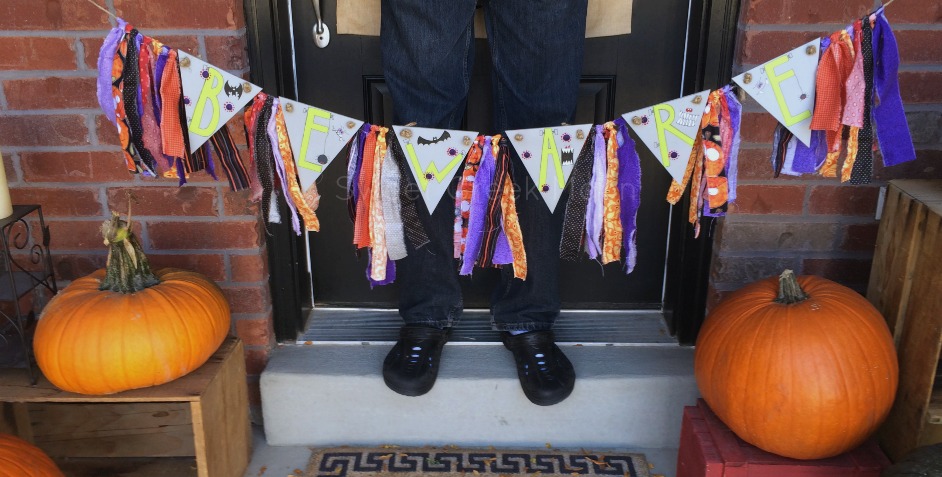
It’s delightful.
[Bless my heart for trying to capture it’s delightfulness in a photo.]
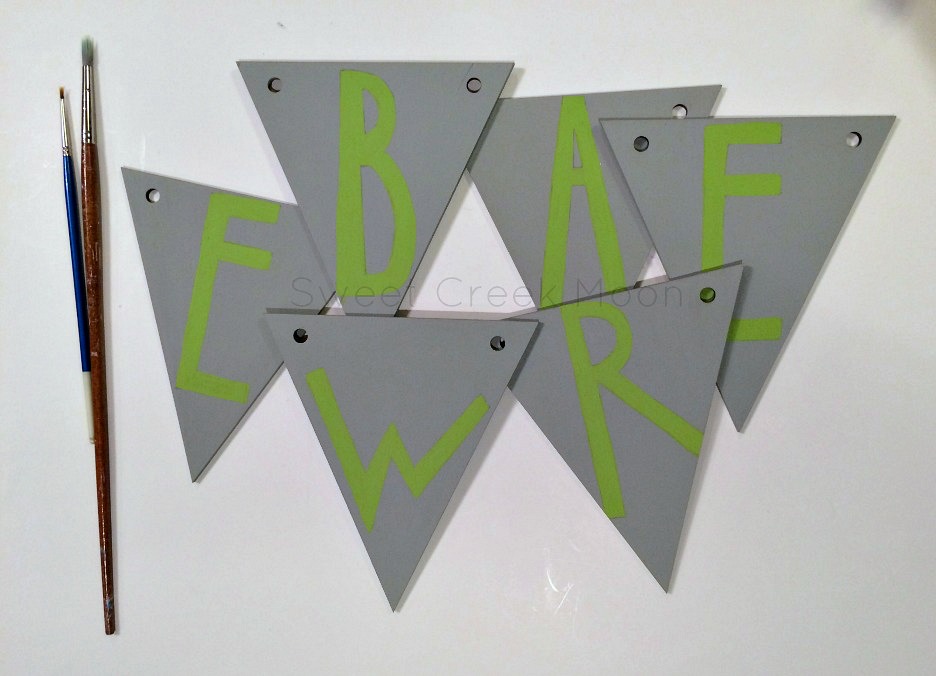
Here’s what you need to make a marvelous Halloween bunting–or any bunting for that matter.
First decide what you want to say. If you want a single word, try googling “7 [or however long you want it] letter Halloween/Thanksgiving/Christmas words.” If it’s a phrase you’re hunting for google “Halloween/Thanksgiving/Christmas songs for children”. You’ll find some quirky, traditional, and even sweet options.
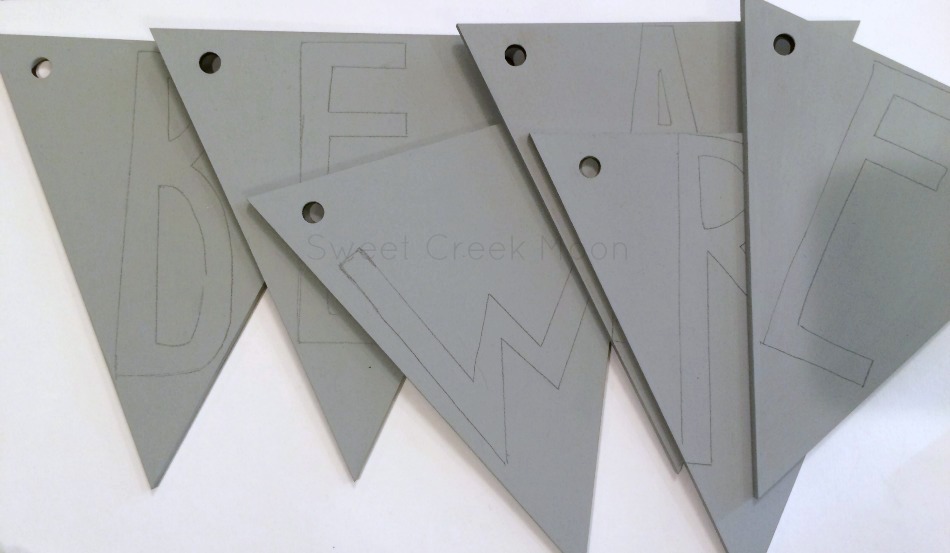
Sometimes just looking will spark an idea. I chose the word “beware” because it seemed to be the exact opposite of “welcome” which is what I wanted.
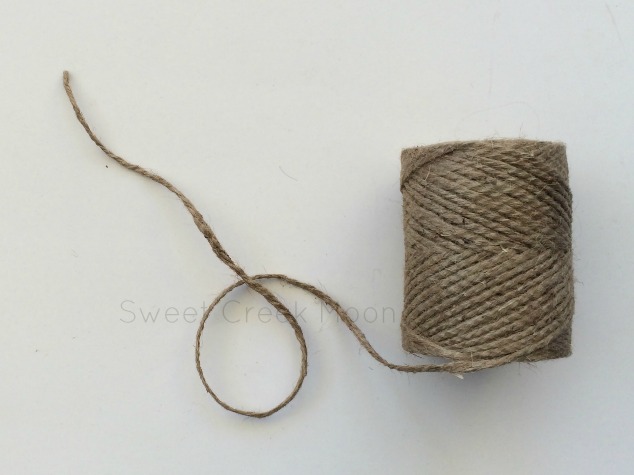
Next, you’ll need to gather the bunting shapes you want in the quantity you want [it will depend on the word/phrase you chose], paint, paintbrushes, Fray Check (or glue), some medium thickness jute, and fantastic permanent pens for outlining/details.
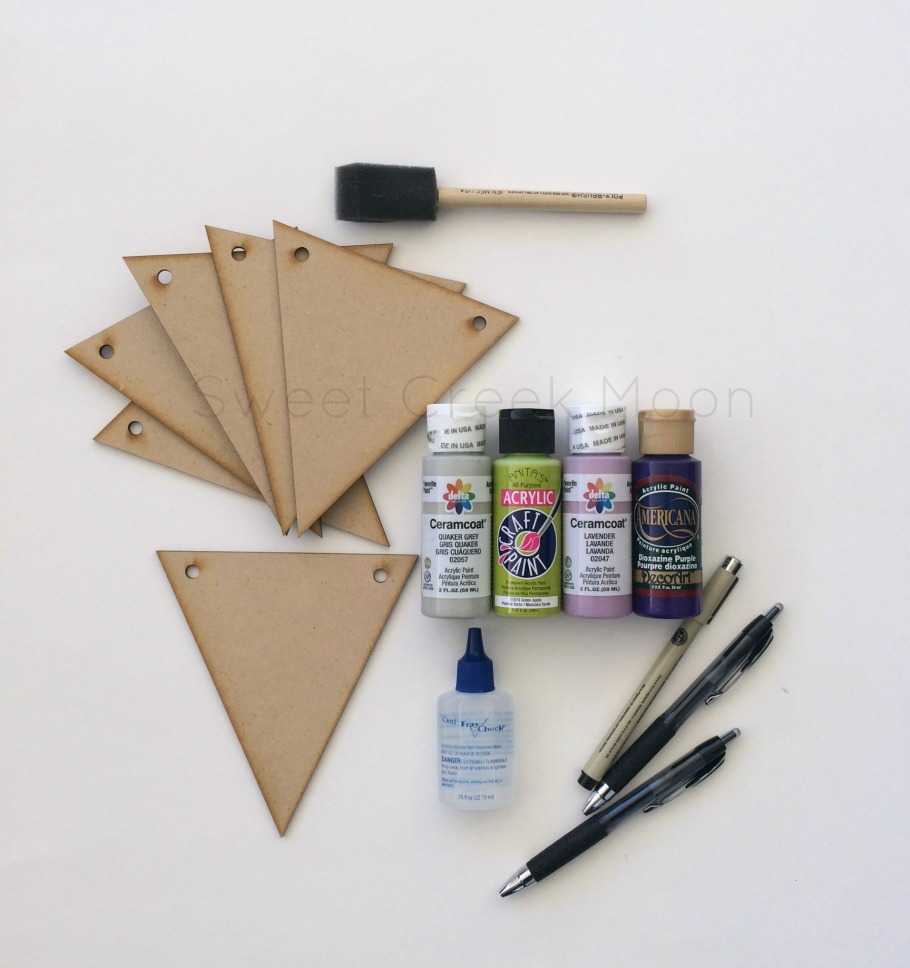
The pens you use to do the outlining should be great pens.
–continuous flow of ink, no matter the thickness of the point
–continuous flow of ink, no matter the surface–painted, mod podge (fabric or paper), rough/smooth surfaces
–option of thin, medium, or thick point
–won’t bleed
–at all won’t bleed [that would be a rotten thing to do after all that work]
–won’t cost an arm and a leg
–available
Everyone has their favorite pens, right? ~smile~
Here’s the jute–just in case someone wants to know.
You’ll also need fabric.
If you don’t have scraps around the house, purchase fat quarters or 1/8 yard of material in as many different colors and patterns as you want.
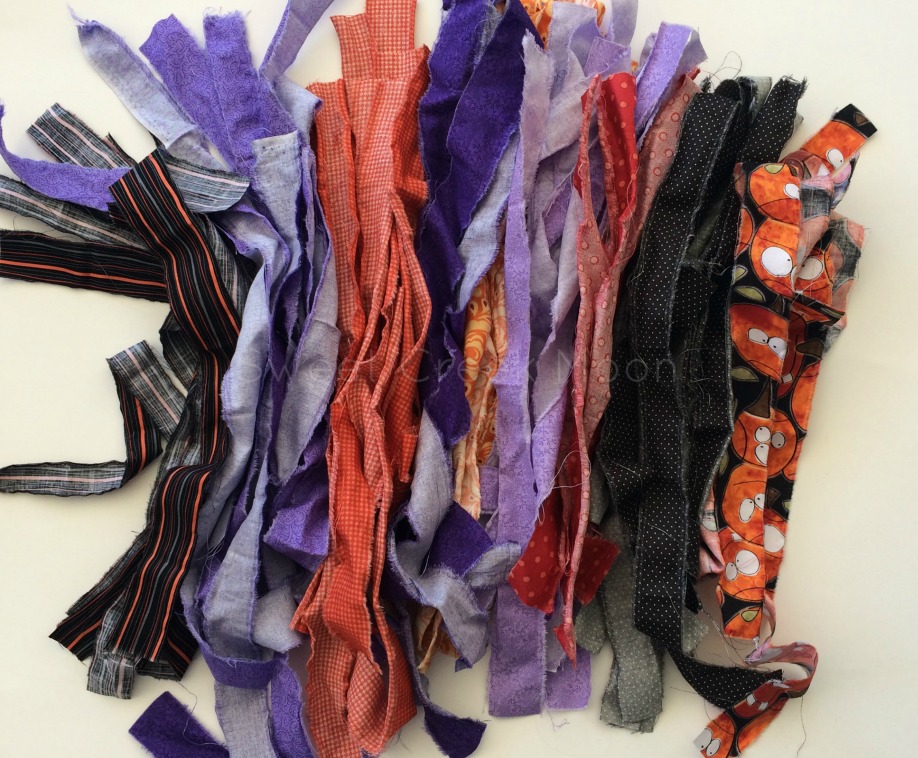
There are nine different kinds of fabric here. You could use as few as three different kinds if you want. Or one, even. Monochromatic works well for specific purposes. I happen to work in a shoppe [ADORNit] that sells fabric they design [not kidding] and it’s fantastic [and no–as in NO–I don’t get paid for saying that]. They treat me splendidly and I’m okay with telling you where I purchased the fabric. [Because some of you will like that fabric and want some of your own.] Yeh-yeh.
I used the ‘snip and rip’ method to prep the fabric. 3/4″-1″ pieces x 22″. Here’s a snip and rip illustration made especially for you.
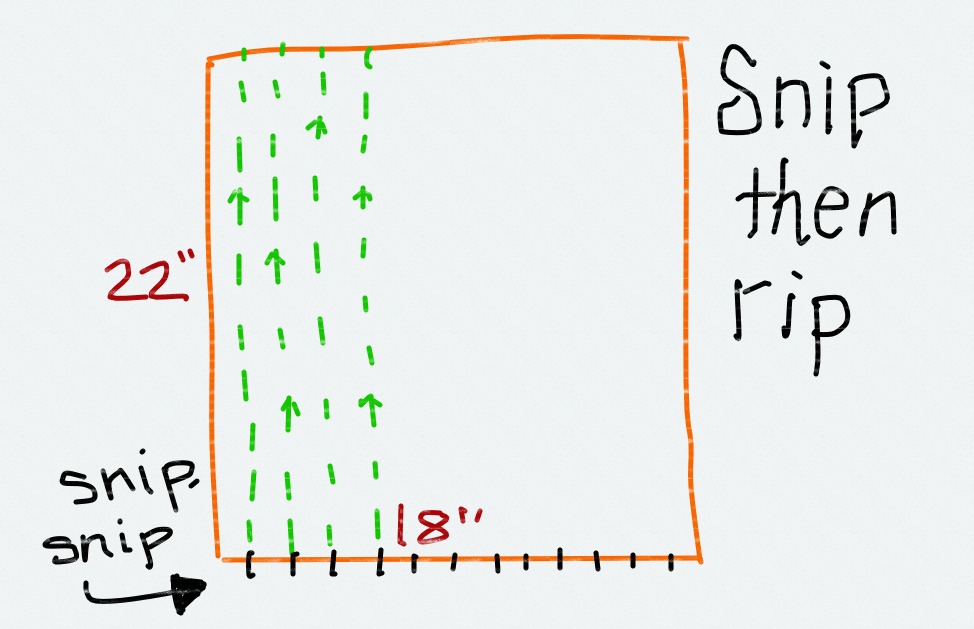
By “snip” I mean use a pair of scissors to cut an approximately [not exactly because you’ll drive yourself nuts doing that] 1/2″ slit along the edge of your fabric. [In the illustration there are 12 snips represented in black.] I spaced my snips between 3/4″ to 1″ thick. Snip all the way across. [Snipping and ripping one row at a time is UgGGhH. Don’t do it. And don’t try to use your teeth to do the snipping part. Won’t work. I even tried to use my canines. No worky.]
The moral of that story is: snip all the starters for your rips ~smile~ Grab and rip the first section off. Voila. Now rip the second one off. Ta-da. Grab the third. Yeh-yeh.
You see the pattern.
[The snipping and ripping took ~30 minutes. I watched Hocus Pocus during this little crafting event. There were moments when dancing was appropriate which means I did more than crafting.]
The pieces end up being 3/4″-1″ wide x 20-22″ long.
[Not every piece is exacka-dacka-lee the same, especially if they’re scraps. Pttththth. Who cares. Not I.]
Now we get to paint. AhhhhhH! Yeh-yeh.
Paint your base coat on. [That’ll take you approximately 10 minutes.]
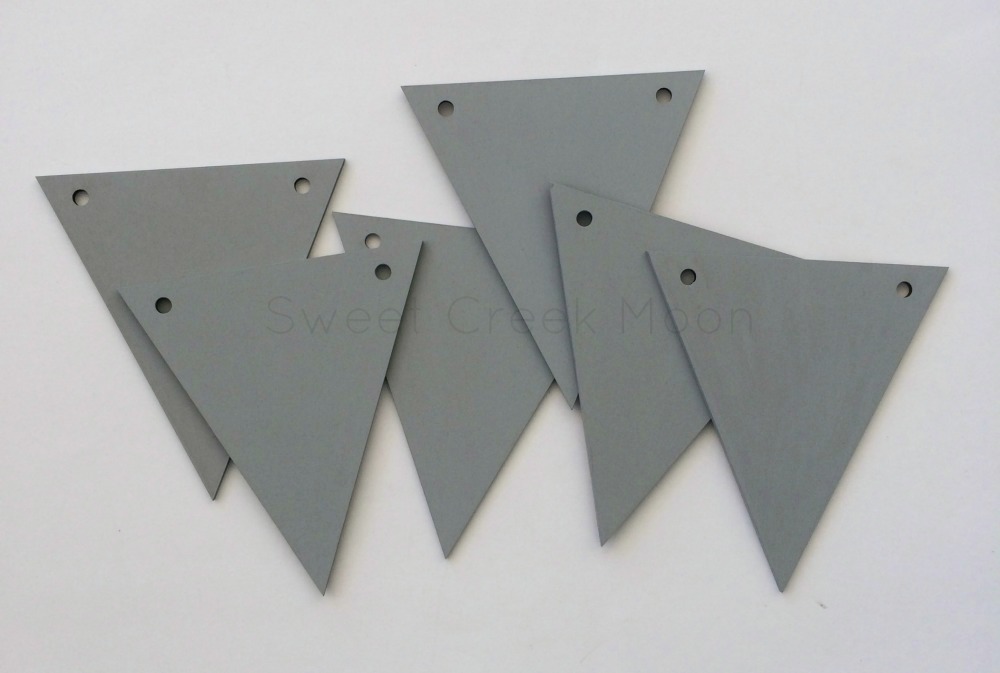
Next, trace your word/phrase onto the painted bunting pieces.
Now, I know that many of you own Crickets or Silhouettes or other fine cutting/designing machines and would be able to program them to quickly provide your letters in vinyl. Excellent to the moon and back. I also know that not every home has one so I’m including a printable with the silly letters I put on my bunting. I’ve also included sketches of the little demons and spiders I added to mine. [Every home should have one.]
~grin~
Step the next: Paint the letters you just traced.
I love that part. It’s a relaxing, delightful thing to do. Yes, I have a Silhouette machine and vinyl to use–but I. love. to. paint. If I wanted to make mass quantities of these [like two] I would use the Silhouette. ~snork-giggle-snarg~
Right now it looks a little snore-boring. Just wait.
As much as I love painting, this next part is what floats my boat–lights up my life–shivers my timbers–shoots me to the moon: the details. [Fireworks–balloons–glitter–it’s all happening in my head when I do details.]
Grab your fabulous pen and outline the letters. Use the end of a thick paintbrush to paint the purple dots and the spider bodies. Use the end of a smaller one to paint the red dots and the eyes. Paint the bat eyes once you have the bodies painted.
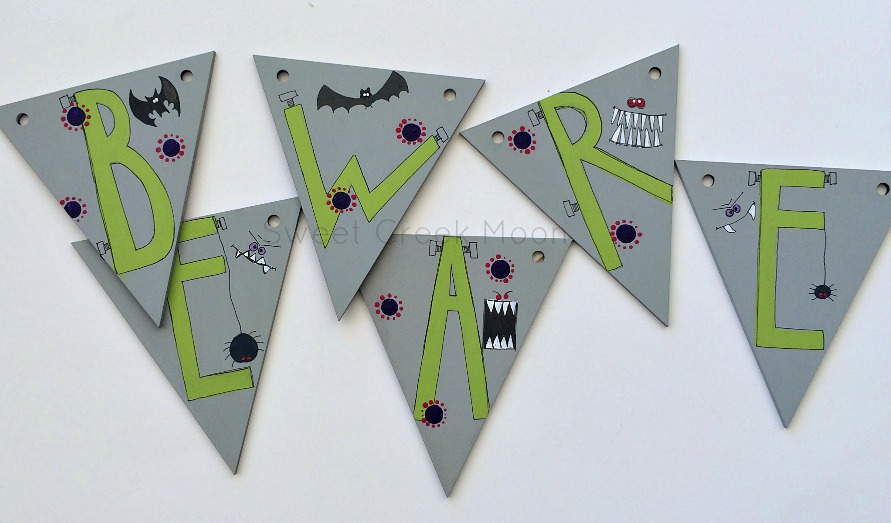
Use a fine to medium pen for spider legs, the Frankenstein bolts, creature faces, and the webs. Use a medium-thick pen for the bat bodies and to fill in the inside of the creature’s gaping mouth. Paint the teeth and eyes before you outline. Don’t make an outline and then fill it in.
Does that make sense?
Those Frankenstein bolts. Love ’em.
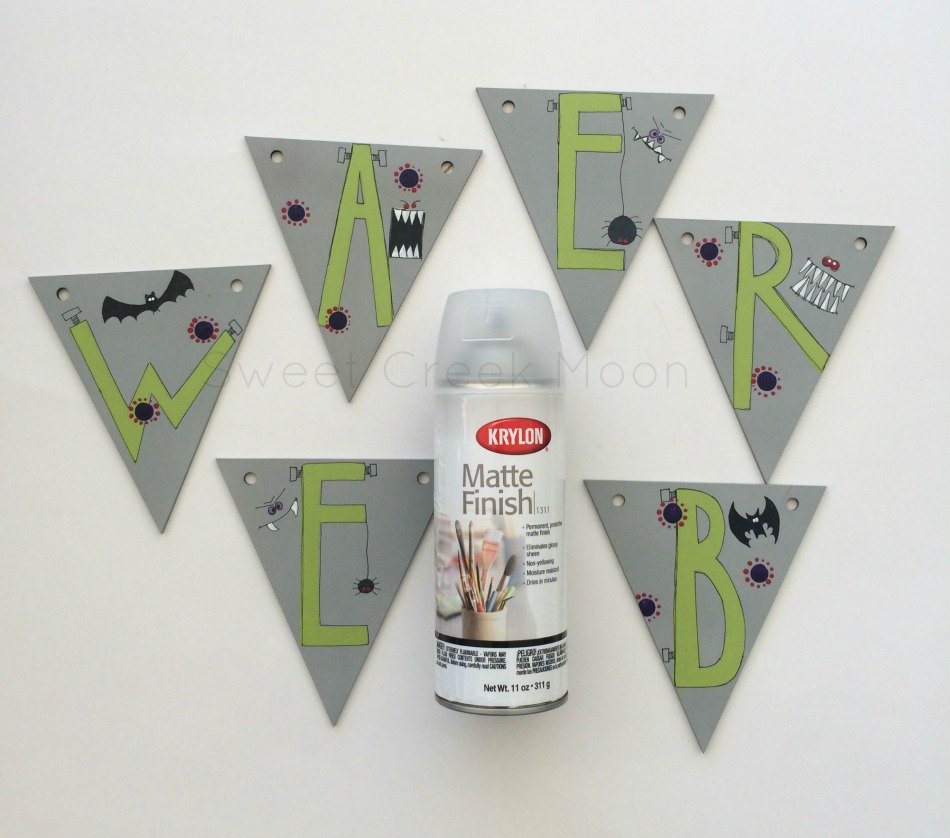
Let that all dry quite nicely which means if you haven’t snipped and ripped your fabric yet now would be a good time.
I use Krylon Matte Finish to seal the deal. ~smile~ Two quick coats and voila–a little better for wear and tear.
The jute comes next.
I did the end pieces first: the B and the E. Allow enough jute for however much you need to hang it where you want to hang it. I used 18″ for the end pieces. The little ‘wart’ knots I made required an extra few inches.
Guess what I did? I made a short and sweet video of how to do the little wart knots. For you-you-you. 2:08 of explanation. Boom.
Once you’ve knotted the pieces together [you can use any method in this whole world to connect the pieces together–wart knots worked for me] start adding fabric.
YAY! WoOt! Shah-boom!
This part’s a blast and a half.
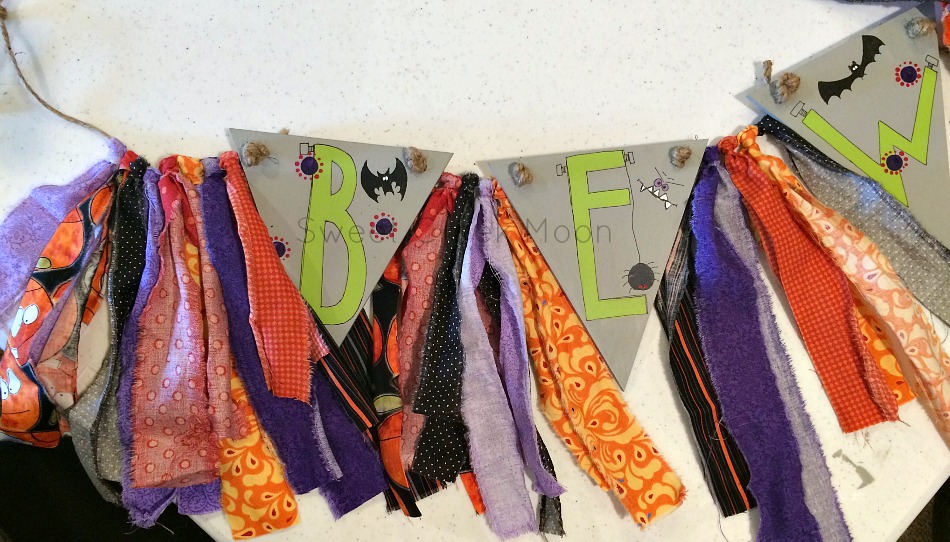
I used nine pieces of fabric on both ends and 5 peices of fabric between the rest of the letters.
There’s no magic formula [that I’m aware of]. I just used what looked great to me.
Hold on to your knickers because here comes another video made especially for y’all. It’s how to attach the fabric with the knot on top. 45 seconds of “how-in-the-world-did-she-do-that?”
I know, I know. It’s super cheesy-easy but it seems like a good idea to cover all the bases.
Once you’ve tied those scraps on, you’re in a very fine position to hang your masterpiece.
Tun-tun-tun-tah! That’s officially one of the gazillion ways to make a Halloween bunting.
Here’s the beware bunting printable I promised.
Okay, before you click on that, please know that I am not Penelope Annabelle Pingleton of Perfection. Of anything. I’m getting my blogging groove on right in front of y’all and I’m okay with that–glitches, glorious wins, grumps, and all. ~smile~
Enjoy.

what do you think?